8 Steps to Fermented Hot Sauce With Wild Greens

Hot sauce fans, this one’s for you! This easy recipe for fermented hot sauce with wild greens is sure to add an extra punch of flavor to your favorite meal.
The following is an excerpt from The New Wildcrafted Cuisine, by Pascal Baudar. It has been adapted for the web.
RECIPE: Fermented Hot Sauce With Wild Greens
Very often, after a private event or a foraging workshop, I have leftover wild greens in my refrigerator. During the summer, when all kinds of chilies are abundant, I like to create various fermented and spicy concoctions with them.
You can use all kinds of wild greens and not be limited by what I used in this recipe. Other wild edibles to include might be watercress, ramps, thistles, wild radish leaves and pods, among others. Feel free to experiment and make you own hot sauces.
Ingredients
- Wild greens: curly dock, dandelion, arugula, wild celery, and black mustard leaves—enough to pack around 60% of a 1-gallon (3.75 l) container
- 40 small organic habanero peppers (make sure they’re not waxed). You can also use any hot peppers you’d like instead of habanero peppers.
- 2 onions
- 10 garlic cloves
- 4 tablespoons (20 g) Korean chili powder (you can use any chili powder—some are hotter than others)
- Salt
- Water
Procedure
 Chop the ingredients very roughly, removing the seeds from the habanero peppers, then place everything into a clean jar or other glass container.
- With clean hands, pack everything tightly in the container. If you’re using very hot peppers, you should use clean latex or rubber gloves. I usually place a bunch of large leaves on top so the chopped material does not float around on the surface later on.
- Make a brine composed of 1 tablespoon (17 g) salt for every 2 cups (473 ml) of water. I needed around 8 cups (1.9 l) of brine in this 1-gallon (3.75 l) recipe. As you gain experience and do more research on the subject of fermentation, you may decide to use less salt, but this brine has worked very well for me and I’ve never had a ferment go bad.
- Place a weight on top of the ingredients to keep them under the brine. I used a pasteurized stone (placed in boiling water for over 10 minutes) to do so. Remove any small pieces that may be floating around.
- Cover your container or if you used a jar, place the lid and secure the band, but make sure it isn’t too tight. The idea is to prevent any potential bacteria or flies from getting into your hot sauce while still allowing fermentation gases to escape. If you screw the band on too tight your jar may explode due to the pressure, and you will end up with a grand mess. It’s also a good idea to place the jar onto a plate during the fermentation process because bubbles will form inside your ingredients and the contents may expand a little, causing excess liquid to escape.
- Once or twice a day, remove the lid and push the stone down to let gas bubbles inside the ingredients escape. You’ll see that there are a lot of them! Always make sure your hands are clean before you do this. I usually let my ingredients ferment from 7 to 10 days. The speed of fermentation is to a large degree related to temperature. In the hot summer months in Southern California, I’ve sometimes stopped the process after just 4 or 5 days. Basically, taste the concoction periodically and stop the process when you’re happy with the flavors. You can ferment much longer, too; once I made this sauce in a fermenting crock and let the ingredients ferment for 4 weeks. It’s really all about flavors.
- The final step is to take your fermented concoction and blend it thoroughly. But you’re not done yet . . . Here is where it becomes interesting and you have a lot of room for creativity. Once you’ve blended your ingredients, taste it again. Does it need more chili powder or salt? Would you like to add some sugar or honey to make it a bit sweet? What about adding some aromatic powders or herbs? Personally, I like my hot sauces to have some nice vinegar flavors and, due to the fact that I make my own “wild” vinegars, I have a wide array of additional tasty choices. The last time I made a fermented hot sauce I added 2 cups (473 ml) of mugwort beer vinegar after blending, but you can also use a wide variety of commercial vinegars for flavor, such as apple cider, rice, or wine vinegars.
- You can store your sauce in the refrigerator and it should last for many weeks. You can also opt to pasteurize your hot sauce and bottle it (see Bottling Your Sauce on page 297). Basically the idea is to use the fermented liquid as a base to make the hot sauce that you like. Some people may say that you kill the good stuff (probiotics) by adding vinegar, but it’s really your choice. On my side, working with chefs and restaurants, I tend to err on the side of flavors.

Making Fermented Hot Sauce: Additional Notes
This sauce will be quite liquid in nature and the ingredients will usually separate after a while—this is easily resolved by shaking the bottle before serving. If you want to make it thicker and have less separation, you can add some chia seeds.
Start with 1 tablespoon (10 g) of seeds per cup (236 ml) of hot sauce, let it rest for 10 minutes, and check the consistency. Add more seeds if necessary. Don’t forget to stir while pouring the seeds so they don’t stick together.
Note: I’ve only used chia seeds with cold/raw sauces so far, so I don’t know what would happen if you boil or pasteurize your sauce.
Sauce Solutions
Another solution to make a thicker hot sauce is to add 100 percent pure cornstarch or xanthan gum. I’ve not used cornstarch myself yet, but based on my research I would start with 1 tablespoon (10 g) of cornstarch for every cup of sauce. When using xanthan gum, I start with 1⁄2 teaspoon (1.2 g) per 1⁄2 gallon (1.9 l) of sauce.
Xanthan dissolves better in hot liquid, so I set aside some hot sauce, bring it to a simmer, and add the gum bit by bit while stirring with a spoon. Then I whisk it thoroughly (you can also use a blender), let it cool, and pour it back into your batch of (cold) hot sauce and whisk or blend everything one more time. From there you can store in the fridge or pasteurize and bottle the sauce.
If all this sounds a bit complex, here is the simplicity of it.
Ferment your ingredients, then blend them to make a liquid sauce. Taste it and add vinegar or spices if you want. You also have the option of using thickeners to make your sauce less liquid. Store it in the fridge as is, or you can boil it, then store in the fridge. I like to enjoy my sauces within a month.
If you’re a pro at canning, you can also calculate the pH, add more vinegar if necessary, and then can it or bottle it to make it shelf-stable.
Recommended Reads
Read The Book

The New Wildcrafted Cuisine
Exploring the Exotic Gastronomy of Local Terroir
$40
You may like...
-
 $29.95
 -
$34.95
-
 $40.00


Recent Articles
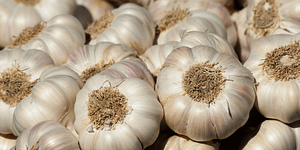
The Garlic Clove! This small crop adds a big punch of flavor that complements almost every delicious dish you could think of. And the best part? These two recipes are a breeze to make together!
Read More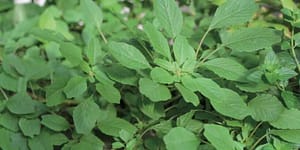
Our love affair with amaranth began long before the pseudo-grain became a trendy staple for gluten-free folk. The luscious leaves of this annual plant are not only packed with a plethora of health benefits.
Read More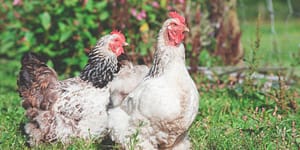
Aside from the sheer pleasure of telling your friends, straight-faced, that you maintain your garden using something called a “chicken tractor,” there are a slew of other benefits to working the land with a few of your animal friends. Getting rid of pests without chemicals, for one; letting them do the work of weeding and…
Read More
If the idea of running a vegetable farm sounds daunting, you’re not alone. What can you do to simplify techniques and reduce expenses? Where do you even begin?
Read More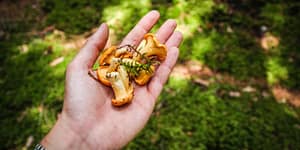
Don’t know where to start for foraging wild plants? Read on for the information you need to begin foraging on your own: where to do it and how to be safe.
Read More