Ancient Customs: Drinking to Good Health and More

It’s a little-known fact, but we here at Chelsea Green Publishing love a good piece of trivia. (Did you know beavers have a second set of lips behind their teeth?) When we found out that the saying “to the last drop” comes from ancient Danish drinking customs, you know we were thrilled. Who doesn’t love drinking-related facts, especially when their origins are centered around drinking for good health?!
The following excerpt is from Brew Beer Like a Yeti by Jereme Zimmerman. It has been adapted for the web.
Health-Drinking
Health-drinking is another ancient custom that was popular throughout Europe, particularly among the Romans, Anglo-Saxons, and Danes. Health-drinking could range from informal toasts to elaborate drinking rituals that could lead to ostracism or worse if not performed properly. Generally, though, it was simply a way to express pleasure or show respect to friends present and past while sharing drinks and food at social gatherings. It was considered impolite in some circles to drink without drinking to the health of a person, idea, or important event.
Games and contests were often included along with health-drinking. The Danes, in a custom that likely goes back to Viking times, would empty a horn after each toast. If more than a drop dripped off the drinker’s thumbnail, they would have to immediately down another. This practice was known as supernaculum, or “to the last drop.” For the English and Saxons, taking a drink without toasting someone at the table was considered rude, and games often accompanied the practice, such as the person being honored not being permitted to move a muscle until the drink was downed.
The sheer scope of drinking games, customs, stories, and feasting traditions referenced throughout literary and historical texts would require many more pages to fully explore. Hopefully this tidbit has encouraged you to resurrect some of these practices yourself or even come up with your own.
Wassail

A pot of wassail I made for a wassail tour in Berea, Kentucky.
Winter festivities were always a good excuse to drink ale, both for warmth and to pass the time with food, friends, and family while the land was hard with frost. One festive health-drinking tradition that is still alive in some communities today is the wassail. A wassail (stemming from the Old Norse ves heill, or “be healthy”) is an activity, toast, drink, and the drink’s receptacle all in one. On New Year’s Day (although sometimes during the time between Yule and New Year’s Day) revelers would go through the village and enter their friends’ houses unannounced, bearing a wassail-bowl of spiced ale—singing carols and presenting wishes for a year of good health by exuberantly exclaiming wassail! as the bowl was held up, drunk from, and passed along.
It was then expected that each household contribute to the festivities by adding its own brew to the bowl and then joining the throng as it moved on to the next house. There are many, many wassail songs celebrating all of the aspects of life for which good health and cheer are offered.
Nearly every household had its own wassail recipe, which could vary quite a bit. In general, the drink was warm and spiced with exotic flavorings. It could range from a mulled wine, to a mulled mead, to a spiced ale or cider, to any combination of these. Often it was a bragot (a spiced honey ale—see chapter 9), although the bragot wasn’t always made with fermented honey, or even spiced at brewing. Sometimes the honey and spices were added later, after the ale was warmed. The wassail-bowl didn’t always consist of liquid nourishment only; a version known as lambswool was made by sprinkling apples with sugar, grated nutmeg, cinnamon, ginger, and other spices, then roasting them until soft.
The skins were removed from the apples, warmed ale was poured over them, and everything was blended into a puree. The bowl was then served while still warm, often with spiced sweet cakes or toast floating on it. I have come across claims that to offer a drink as a “toast” came from this tradition but have been unable to verify it. Still, it’s a worthy concept to consider.
Ingredients to serve 6-8
6 apples
1 teaspoon each freshly grated nutmeg, cinnamon, cloves, ginger, or any other spices that suit your fancy
1⁄2 cup (125 mL) organic cane sugar or brown sugar
1 cup (250 mL) water (or substitute hard cider, ginger beer, red wine,
Madeira, port, mead, or what-have-you)
1 small lemon or orange
4 pints low-to-no-hopped ale, preferably British-style ale, spiced dark ale, or bragot
Dark rum, brandy, or other spirits (optional)
Process

Mugs of lambswool wassail.
- Core the apples and place them in a pot or deep baking dish.
- Sprinkle the spices and sugar and pour the water or what-have-you over the apples.
- Squeeze the juice of the lemon or orange (or both) over everything.
- Place a pot on a medium-high burner, or put a baking dish into the oven at 350°F/180°C.
- Cook for about 45 minutes or until the apples are soft and mushy.
- Remove from the heat and allow the apples to warm enough to carefully remove their skins.
- Once the skins are removed, take a masher, large fork, or blender and blend everything (including the ale) into a puree (for the lambswool option; otherwise, remove the apples and make them into boozy applesauce).
- Place the lambswool in a bowl with a serving spoon, or ladle it into individual mugs.
- Optional: Add as much additional dark rum, brandy, or other spirits as you desire; I like to keep this going for several days by continuing to add various drinks and spices to it and rewarming it.
- Wassail!
Recommended Reads
Read The Book

Brew Beer Like a Yeti
Traditional Techniques and Recipes for Unconventional Ales, Gruits, and Other Ferments Using Minimal Hops
$24.95
You may like...
-
 $24.95
 -
 $29.95
 -
$30.00


Recent Articles
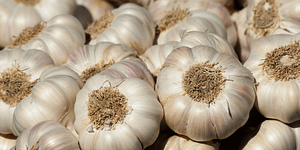
The Garlic Clove! This small crop adds a big punch of flavor that complements almost every delicious dish you could think of. And the best part? These two recipes are a breeze to make together!
Read More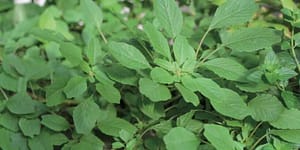
Our love affair with amaranth began long before the pseudo-grain became a trendy staple for gluten-free folk. The luscious leaves of this annual plant are not only packed with a plethora of health benefits.
Read More
Don’t know where to start for foraging wild plants? Read on for the information you need to begin foraging on your own: where to do it and how to be safe.
Read More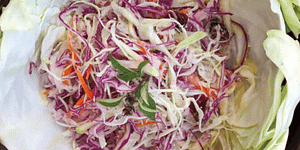
Easy rainbow coleslaw! Transform your salad game with this colorful recipe. It is surprisingly packed with flavor and is a great addition to your repertoire.
Read More
If you love tomatoes, you probably already know just how many varieties of these summertime staples there are. But do you know what makes each one unique?
Read More