

Compost: Small Farm-Style

With the right strategies and practices, composting on a small farm is surprisingly easy and inexpensive. Just follow these steps for making compost, and your farm will be thriving in no time!
The following excerpt is from The Lean Farm Guide to Growing Vegetables by Ben Hartman. It has been adapted for the web.
(All photographs by Ben Hartman and all illustrations by Emma Gerigscott unless otherwise noted.)
Relying On Compost for Soil Fertility
When we first started to rely heavily on compost for our soil fertility, we were unique in our area. Many farmers use compost, but not in the amounts we were using.
Why has this ancient practice diminished so markedly? For one, since the advent of the railway system, farmers have had other options. When railroad transport came along in the 1800s, companies could ship mined minerals, and eventually chemical-based fertilizers, across thousands of miles.
Composting: Suited for Small Farms
A more recent reason is that farming has gotten too big, and labor too expensive, to follow older practices. On hundreds of acres of land, it is impractical, even with large machinery, to imagine a system relying on the regular application of compost.
It is much cheaper to distribute lighter-weight and less bulky granular and liquid fertilizers. In terms of transportation costs, composting is better suited to small farms.
Even so, what small farmer has 22 out of 28 workdays to devote to making and moving compost? In our earliest experiments we formed piles by hand, layering straw, manure, and garden scraps. We framed the piles with straw bales. We hauled everything with pitchforks and garden carts.
Soon we realized that our backs would not hold up, and that we couldn’t afford the time to make the amount we needed. If we wanted to get serious about using compost, we had to lean up.
The Lean System: Relying On Resources
If you are fortunate enough to live near a composting service that will give you a good price for a quality product, by all means save your time and buy from them. In many places, however, such a product is not available.
We rely both on purchased compost and our own, which we make on the farm.
Shigeo Shingo, one of the designers of the lean system, writes that improvement involves four purposes: “easier, better, faster, and cheaper.” Our compost making aims to achieve all four.
Composting With the Lean System
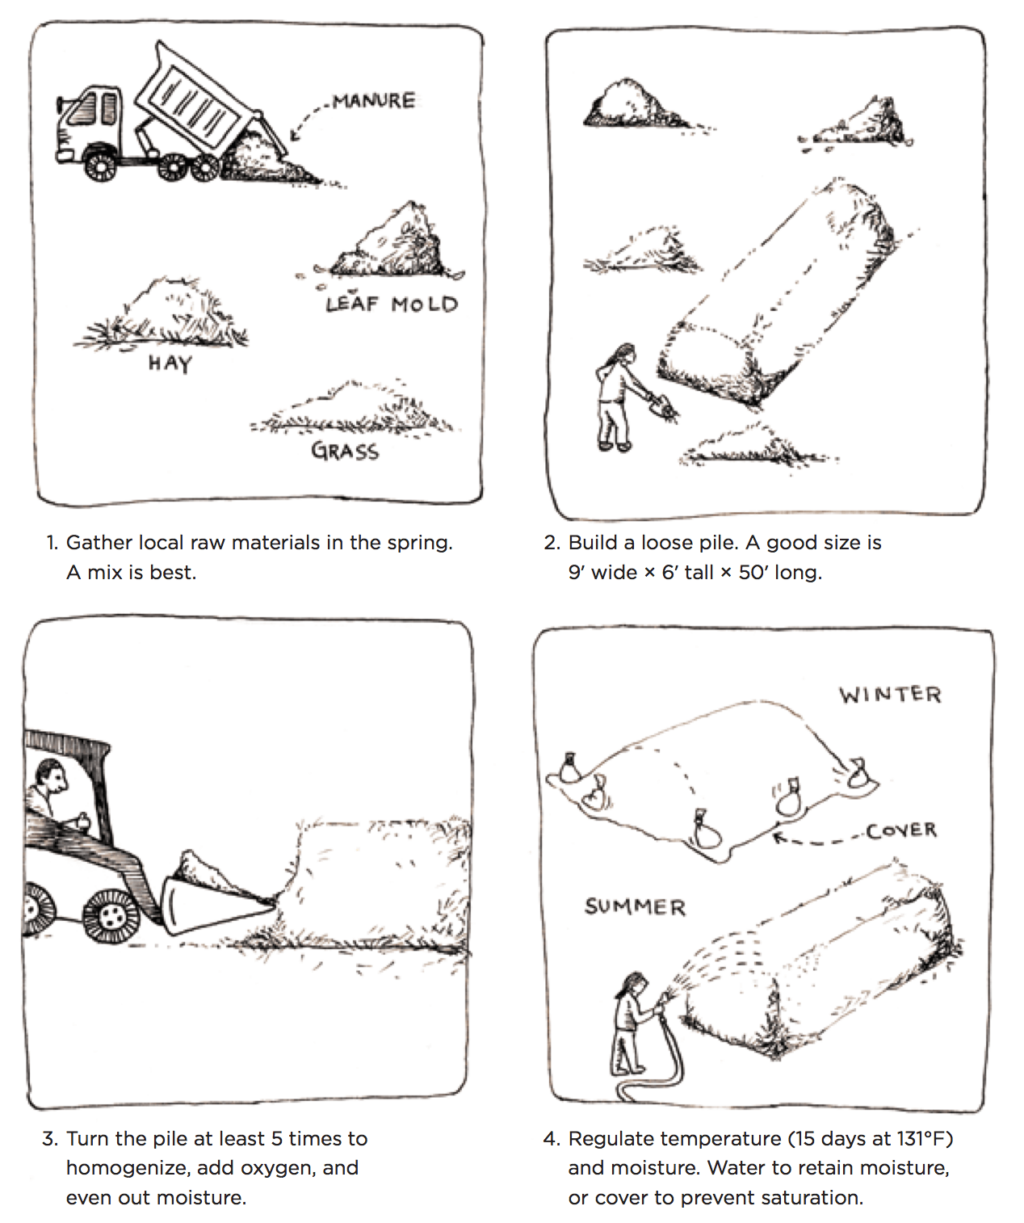
We hire trucks to deliver raw material (old hay bales, straw, leaves, manures— we are not too picky) from wherever we can for as low a cost as possible in the spring, aiming for around 75 cubic yards.
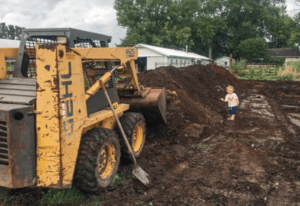
Then we form a windrow about 6 feet tall by 9 feet wide by 50 feet long with our skid loader, a much faster method than hand-forming piles.
Throughout the season we turn it five times (the easiest way is to move the whole pile) and monitor to ensure the compost reaches a temperature of 131°F for 15 days. This high temperature produces the best-quality compost because it kills weed seeds.
We water it in the summer so it doesn’t dry out. We cover it in the winter with a compost fabric so it doesn’t become waterlogged from rain.
The Steps to Making Compost
Under ideal conditions, the pile is ready to use in four to five months, but we typically save it for the following season, which begins in January in the greenhouse. With practice, compost making does not consume a lot of our time.
Here are the steps to make compost in detail:
- Gather raw materials.
- Build the pile.
- Turn the pile.
- Regulate moisture and temperature.
Step 1: Gather Raw Materials
Among the most important tasks in the first years of your farm, if you plan make your own compost, is to find sources of raw material. Unless you have haying equipment and dozens of extra acres, or a feedlot of animals depositing manure, this means searching off-farm.
Raw Materials Used in Compost
You might be surprised at what is available. Every year our compost changes because our raw materials come from so many different places. We have used the following:
- Moldy hay from neighboring Amish farmers
- “Floor bales,” bales of hay stored on the bottom layer in a barn, often too poor in quality for animal feed
- Large, round bales of straw that have sat out in the rain
- Cuttings from our pasture, collected with a flail mower and catch basin
- Leaves from our farm or trucked in from other properties
- Grass clippings from our farm or trucked in
- Vegetable wastes from our farm and other households
- Duck manure (from an organic farm) in sawdust bedding
- Duck manure in straw bedding
- Chicken manure from our own chickens
We cast a wide net because the best composts are made of a broad mix of materials. As long as a material was once alive or from a living thing (such as manure) it will decompose, and we use it, provided it is safe.
With the widespread use of antibiotics, herbicides, and GMO feeds, what constitutes “safe,” of course, varies from farmer to farmer. It is up to you to decide your comfort level with raw materials.
Composting With Manure: Avoid Extremes
We compost animal manures and their bedding separate from green manures. An ideal mix contains 25 to 30 parts carbon (C) to 1 part nitrogen (N), although we do not take the time to calculate C:N ratios—quality composts can result from a wide range of ratios.
The key is to avoid extremes. Piles too high in N will become too hot, killing the beneficial microorganisms.
Piles with too much C and not enough N will not heat up enough. As a general rule, manures and green grasses are “hot” (high-N) and materials such as straw, leaves, and wood chips are “cold” (high-C).
For organic certification, you may need to document C:N ratios. One good online source of carbon-nitrogen information is the Center for Environmental Farming System’s “Composting on Organic Farms”
Price: The Biggest Challenge
Our biggest challenge is price. In many areas, composting ingredients can be had for free. I know of one farmer who is paid to pick up manure. Unfortunately, that’s not the case for us. We secure most manure for free, although we pay for delivery. Our cut-off point for what we are willing to pay for raw material, without delivery, is around $6 per yard.
We are not concerned about weeds—our piles will heat up enough to kill them. Wood shavings are fine, but we don’t allow large wood chips. Other than that we are not concerned about particle size. Even clumped-together hay soon breaks down and separates.
Step 2: Build the Compost Pile
 When trucks arrive, I direct them to our compost yard, set away from our greenhouses and outdoor growing area to prevent leaching. The yard is easy for dump trucks to back into.
It is surrounded by grass to keep runoff to a minimum. It is out in the open, as there is no need for a building.
How to Build A Compost Pile
To build the piles, we push the raw materials together with our skid loader to form windrows 9 feet wide by 6 feet tall. We mix the different materials together as we build the pile.
We used to place bales of straw around the perimeter for containment and insulation, but we no longer do this: it adds cost and makes the pile inconvenient to turn.
How Big Should Your Pile Be?
There is no consensus on the ideal size of a compost pile, but in general bigger is better, as long as air can reach the core. Most decomposing activity happens in the core—in the middle—where heat builds up. You want a large core.
Also, small piles can dry out quickly because they have a high surface-to-air ratio and do not insulate themselves as well as larger piles.
I credit Steven Wisbaum, a professional compost specialist at CV Compost in Charlotte, Vermont, for helping us design our system. Wisbaum notes that, from his experience, naturally porous piles made with low-density materials such as horse manures or shredded debris can be built up to 15 feet wide.
Piles larger than that are impractical to manage and can suffer from a poor rate of gas exchange, trapping gases that need to escape from the core. When using denser materials, such as leaves or grass clippings, I recommend a smaller pile so that it “breathes” better.
What Determines Compost Pile Size?
In actual practice, for most farms the size of the pile is determined by equipment. Ours is determined by our Gehl 44-horsepower skid loader, which can comfortably dump loads at a height of 6 feet.
If you use a compost turner, a tractor-powered implement for mixing compost, your piles might be shallower and narrower.
For length, I recommend piles 50 or 100 feet long, as most compost covers are sold in 50-foot increments (discussed further in “Step 4. Regulate Moisture and Temperature” on page 154; see also appendix 1 for more information on compost covers).
Piles should also be sited near a source of water for irrigating. If composting raw manures, consider your neighbors and minimize foul odors by mixing fresh manures with other materials.
Alternatively, cover or mist fresh manures, or use an additive that discourages the growth of odor-producing microbes.
Step 3: Turn the Compost Pile
There are three reasons to turn piles:
- Homogenize the compost, blending raw ingredients together and breaking up clumps. This makes more food available to microbes as decomposition proceeds.
- Restore pile porosity lost through settling, thus allowing oxygen into the core. While some oxygen is introduced during the actual turn, most oxygen used in composting arrives through “passive aeration,” as air moves in and out through pores.
- Even out moisture in the pile, mixing drier outer layers with the wetter core.
The net result of turning is heat, a primary by-product of decomposition. Sustained heat above 131°F kills off pathogens and weed seeds and also stimulates faster decomposition. We turn a pile by picking it up bucket by bucket and shifting it over by about 10 feet, in effect building a new pile.
Turning Equipment Options
While we rely on a skid loader, professional composting companies and large farms use compost turners, which require large tractors. This machinery costs tens of thousands of dollars and does not pay off for most small farms.
Larger operations also use grinders and sifters that break apart or separate larger debris. We have never used either one and have not had problems, since we do not need perfect-looking compost.
If larger clumps survive until planting time, we can pull them out with the 30-inch bed rake or break them up with a tiller.
Another common practice is to use a manure spreader to turn piles. With this system, compost is scooped up with a skid loader, dumped in the spreader, and emptied into a windrow. The process adds lots of oxygen and breaks the compost into small pieces.
While we have done this in the past, we don’t find the spreader to be necessary for our current mix of ingredients.
How Many Times Should You Turn A Compost Pile?
 Many educators advocate for frequent turnings, as often as once per week, on the theory that more turns equal more oxygen and heat.
Others argue for a “minimal number of well-timed and thorough turns.”
Steven Wisbaum of CV Compost says this saves labor and equipment costs, reduces the release of foul odors, conserves nitrogen and moisture, and produces compost with higher organic matter content.7
With this system, a farmer uses proper management—building porous piles with a wide variety of materials, and maintaining even moisture—so that microbes, not machines, do most of the work.
Using An Organic Approach
As we are certified organic, we stick to the five-turn approach required for certification, while attempting to use good management practices to keep turns limited to five.
Once a pile is complete, there is no need to keep turning it unless it was allowed to dry out, in which case turning, plus irrigation, can bring it back to life.
An alternative to the turned-windrow method is to create static aerated piles. This involves inducing oxygen into piles through tubes that force in air.
Several websites offer plans for these systems, which can be a good option if you don’t have turning equipment, though these systems will involve a more complex setup and more maintenance.
Step 4. Regulate Moisture and Temperature
Just as the tiny organisms in the compost heap need food and fresh air, they also need water and comfortable temperatures.
Regulating Moisture
While regulating water content is essential to compost making, many farmers overlook it. To monitor moisture, we pick up a handful of compost and examine it. With a hard squeeze the mix should just barely stick together, and water should drip out, indicating moisture content of around 60 to 75 percent.

Tubing with emitters to water compost. Watering compost is essential but often overlooked.
If water drips out with no squeeze or a light squeeze, it is too wet. If we see no droplets, it is likely too dry.
Several instruments are available for more precise moisture reading, but in our experience they are not necessary.
If there is too little water, the composting process stops.
In the summer we water compost with a spare 2-inch drip tape main line run across the top of the pile into which we have inserted micro sprinklers every 3 feet.
If we have several piles to water, we use overhead sprinklers to water them at the same time. It is important to water as evenly as possible across the entire surface.
Drip tapes do not work well for watering evenly because water tends to pool at the emitters.
If compost is too wet, decomposition also grinds to a halt because pore spaces, where oxygen enters and leaves, become plugged up.
In our location, heavy late-fall rains and winter snowmelt can saturate our compost.
For that reason we cover the pile with a composting fabric from November to March. The cover is made out of an advanced- technology fabric.
It is porous so some rain and snowmelt can pass through and CO2 can still escape, but once saturated the pores close, maintaining even moisture. The cover also helps insulate the pile.
Regulating Temperature
Proper temperature is as important as proper moisture level. We record the temperatures of our piles on a spreadsheet before each turn. Long-stemmed compost thermometers are the easiest way to measure the temperature.
If the pile is not heating up, we turn it more or add more nitrogen, usually in the form of fresh duck manure. We might also adjust the pile’s moisture content, as soppy mixes and bone-dry mixes do not heat up well. The ideal heat, as mentioned, is 131°F.
Piles that are too hot, above 155°F, suppress certain beneficial microbes and need to be cooled down. We just leave the pile undisturbed, allowing it to cool naturally.
We know our compost is finished when it turns dark brown or black, smells earthy, and crumbles easily (resembling cake crumbs) and when raw materials are no longer distinguishable from one another.
Even after it is finished, we try to maintain even moisture to keep microbes alive, though we allow it cool below 131°F.
In most cases, we then pick the compost up with the skid loader and move it to where we want to use it. In the case of tomatoes, as stated, we sometimes mix in minerals with the compost for our monthly side dressing, depending on the result of tissue samples and soil tests.
To do this, we spread out an 8- to 10-inch layer of compost on the ground somewhere, sprinkle on the mineral powder, and till with the tractor or BCS. In addition to blending in minerals, this also makes for a fluffy mix that is easy to apply by hand around the base of the tomato plants.
Recommended Reads
Read The Book
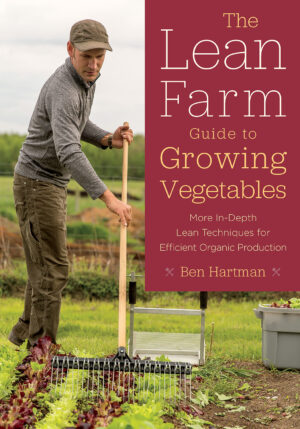
The Lean Farm Guide to Growing Vegetables
More In-Depth Lean Techniques for Efficient Organic Production
$14.97
You may like...
-
 $26.21
 -
 $22.48
 -
 $19.98
Recent Articles

Asparagus is a delicious vegetable with a layered history. How did this aspiring spear make its way from growing in the wild to appearing on our plates? The following is an excerpt from the The Seed Detective by Adam Alexander. It has been adapted for the web. “Nature gives us the key to every secret…
Read More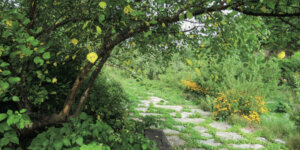
Interested in growing trees? Here are some tips on successfully planting, transplanting, and pruning trees to create a flourishing forest garden! The following is an excerpt from The Home-Scale Forest Garden by Dani Baker. It has been adapted for the web. Planting Potted Trees and Shrubs If you order potted trees, check with your supplier to…
Read More
With the right strategies and practices, composting on a small farm is surprisingly easy and inexpensive. Just follow these steps for making compost, and your farm will be thriving in no time! The following excerpt is from The Lean Farm Guide to Growing Vegetables by Ben Hartman. It has been adapted for the web. (All photographs by Ben…
Read More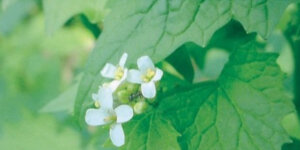
Garlic mustard: while known as “invasive,” this plant can be consumed in its entirety and has great nutritional value. Plus, the garlic-flavor is a perfect addition to any recipe that calls for mustard! The following are excerpts from Beyond the War on Invasive Species by Tao Orion and The Wild Wisdom of Weeds by Katrina…
Read More
Everyone loves a refreshing, fermented, nutritious drink…even your garden! Take your fermentation skills out of the kitchen and into the garden by brewing fermented plant juice. The following is an excerpt from The Regenerative Grower’s Guide to Garden Amendments by Nigel Palmer. It has been adapted for the web. How to Make Fermented Plant Juice Fermented…
Read More