How to Use Vinegar Extracts to Enrich Your Soil
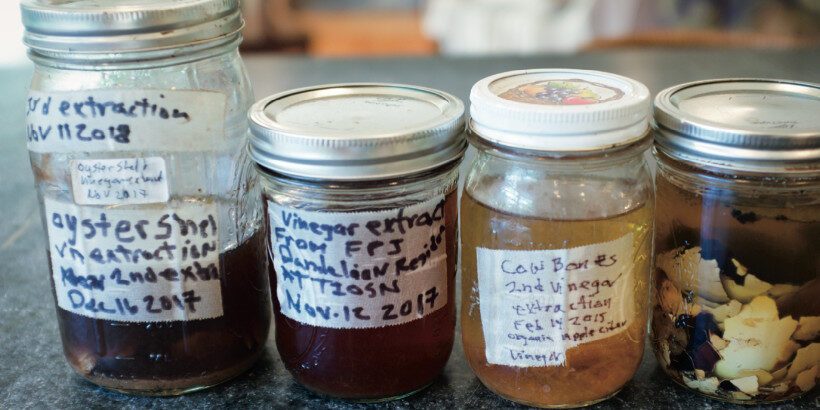
Want to enrich your soil and get the most out of your garden? Mastering soil amendments is a must! Soil amendments, such as composting and natural sprays, enhance soil and increase nutrients available to your plants.
Use just a little bit of vinegar and some leftovers in your kitchen to create an extraction that will give your crops a hearty boost!
The following is an excerpt from The Regenerative Grower’s Guide to Garden Amendments by Nigel Palmer. It has been adapted for the web.
Enrich Your Soil With Vinegar Extracts
Vinegar extractions are a great example of a sustainable agriculture amendment, because you can use apple cider vinegar you make yourself and locally sourced materials such as eggshells and animals bones left over from your home-cooked meals or gathered from a restaurant, butcher, or fisher on the docks if you live near the ocean. It’s a good exercise in becoming aware of the free resources available in your area—be creative as you search.
The acidity of organic apple cider vinegar breaks down mineral constituents of materials into water-based forms that are shelf-stable for years. Vinegar extractions may be diluted and applied directly to plant roots, leaves, and bark as well as the soil.
One nice aspect of this recipe is that if the contents are forgotten and left to sit for months, that’s okay! My kind of time constraint.
Use Kitchen Leftovers to Enrich Your Soil
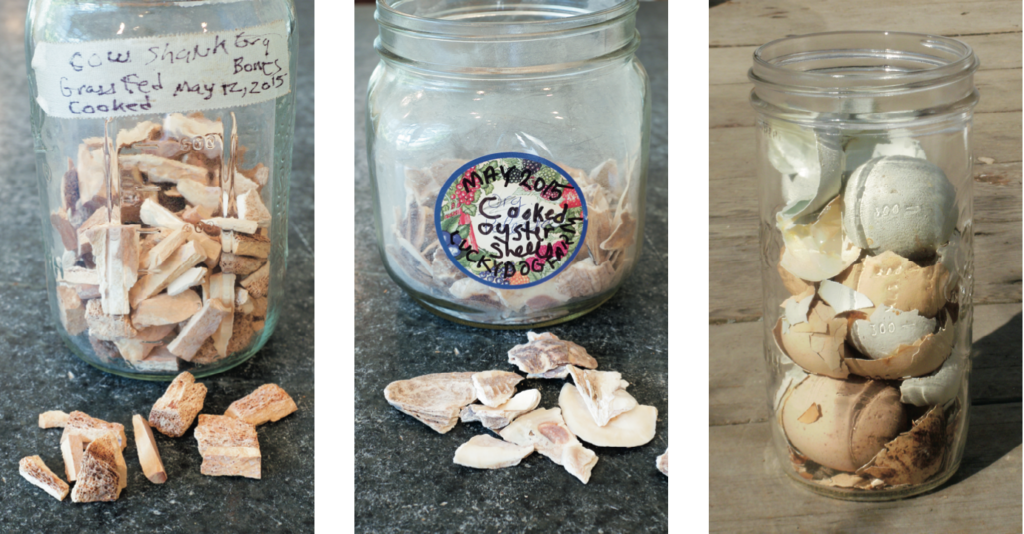
You can try this process with many types of animal products, and it’s a great way to close waste gaps while making sustainable mineral amendments. Rather than throwing materials away, extract their minerals and feed those valuable mineral nutrients to plants and soil biology. Good choices include shells—egg, oyster, crab, or clam—and bones, including cow, fish, and pig bones.
Any local restaurant that serves oysters probably throws out those shells each night. Chat with a member of the staff—ask whether you can leave a bucket on Friday afternoon for the kitchen staff to toss the shells into and pick it up Sunday morning.
Utilize Residual Materials
The bucket will contain extraneous stuff besides the oyster shells, but you can separate out the shells, wash them, cook them, and store them for future use. Crab shells, clamshells, eggshells, and other resources may be gathered in a similar way. And when you make a nutritious bone broth, save those bones for vinegar extraction, too. This process may be scaled to any level.
You can also extract minerals from the residual materials of fermented plant juice using vinegar, maximizing the opportunity to collect the unique mineral concentrations of the plant materials.
A Vinegar Extract to Enrich Your Soil
Materials
- Eggshells, bones, shells, or other available material
- Oven, grill, or fire
- Glass jar or crock
- Organic apple cider vinegar
- Piece of clean cloth
- Strainer
Procedure
Step 1. Be sure to give thanks for the materials provided, gathered, and used. Then begin by cooking the materials to remove water and residual organic material. Eggshells can be toasted in a toaster oven—just pop them in and push the toast button one to three times.
Be sure the toaster is set for light toast. Bones used for making a broth can be cooked on a grill afterward or in a large metal can over an open fire to remove moisture and any residual organic material. On a gas grill set at medium heat (300 to 350°F/150–175°C), bones will cook sufficiently in 40 to 60 minutes, depending on their initial state.
To cook bones over an open fire, first punch several holes in the can to provide ventilation. Once the fire has burned down, nestle the can filled with bones into the bed of coals for the night. By morning moisture and residual organic material will be gone. Cooking bones outside allows any unwanted smells to drift away rather than stink up the kitchen.
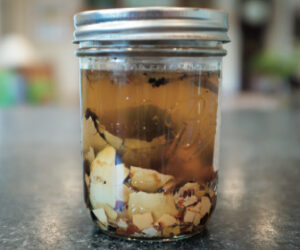 Oyster or clamshells may be cooked in the same way as bones; an indoor oven set at low heat will also work. It may work best to cook lightweight shells like crab shells in the toaster oven, as you would eggshells. It is most efficient to cook material in bulk and store the cooked material on the shelf, and then extract them as needed.
Step 2. When you want to make an extraction, add cooked materials to a jar or crock, filling about 10 to 15 percent of the container.
Step 3. Add organic apple cider vinegar, filling the container close to full. Leave at least 1 inch (2.5 cm) of space at the top, because fizzing and foaming may occur as chemical reactions start to take place. It’s a good idea to put the jar or crock in a bowl or on a tray to catch spills.
Step 4. Put the cloth over the top of the jar or crock and store in a well-ventilated space out of sunlight for at least a week. Do not cover the jar or crock tightly, because the gases of reaction need to escape. A lid can be used to cover a glass jar during this phase, but leave it loose.
Step 5. After a couple of weeks, the extraction will have run its course, and the liquid may be decanted. Repeat extractions after decanting the liquid. There is still much mineral left in the bones or shells after the first extraction, so repeat the process until no gas reaction occurs. This may be three to five times.
Step 6. Strain and store the liquid in a glass jar with a secured top in a well-ventilated space out of sunlight. Be sure to label the container with dates, the extraction process used, and the ingredients. If you do multiple extractions of a batch of material, you can store all the decanted liquid in one glass container.
Step 7. Once you have extracted the bones or shells as many times as you wish, put the residual material into the compost pile. These cooked materials lack the odors that may attract most types of animals, although I have found leftover chunks of bones in trees around my property, gnawed on by squirrels that recognized the bit of mineral content that remained in them. Now, that is completing the waste cycle.
Uses For Vinegar Extract
Shells are good sources for calcium; bones provide calcium and phosphorus as well. Both are rich in macro- and microminerals wanted in the soil and by plants.
These products may be used to augment the mineral content of broad-spectrum amendment products, such as fermented plant juice made from dandelions, to facilitate the mineral needs of plants at different growth phases. Dilute vinegar extractions with good water at a ratio of 1:500 up to 1:1000. (One tablespoon in 4 gallons / 15 L is approximately 1:500.) Apply as a foliar spray or a drench.
Recommended Reads
https://www.chelseagreen.com/2023/a-drink-only-a-garden-could-love-fermented-plant-juice/
Recent Articles
Searching for tips on how to grow healthy plants? The excerpt below offers advice on how to improve your farm or garden’s immune system through providing optimal conditions, managing plant competition, and achieving optimal nutrient balance. The following is an excerpt from The Ecological Farm by Helen Atthowe. It has been adapted for the web.…
Read MoreGet ready to create your own seven-layer forest garden! Food forests, or edible forest gardens, are life-filled places that provide habitat for wildlife and food for humans while promoting natural beauty and biodiversity. To get started, all you need is to take a page from Mother Nature’s book. The following is an excerpt from Gaia’s…
Read MorePicture-perfect farms may be aesthetically pleasing, but they’re likely lacking in biodiversity. Rewilding practices allow the land to return to its natural wild state, providing more room for fruit-bearing plants to grow and animals to control small pests. The following is an excerpt from Farming on the Wild Side by Nancy J. Hayden and John…
Read MoreLet’s drop the beet! Beets can be grown year-round and are a perfect, flavorful addition to meals. Get started on growing your own no-till beets with help from these tips! The following is an excerpt from The Living Soil Handbook by Jesse Frost. It has a been adapted for the web. How to Grow No-Till…
Read MoreLooking for ways to naturally enrich your garden? The answer is all around you….literally. Add local rocks & soil to your garden to improve soil health and see your crops flourishing in no time. The following is an excerpt from The Regenerative Grower’s Guide to Garden Amendments by Nigel Palmer. It has been adapted for the…
Read More
