

From Foraging to Fermenting: How to Brew Fruit-Based & Flower Mead
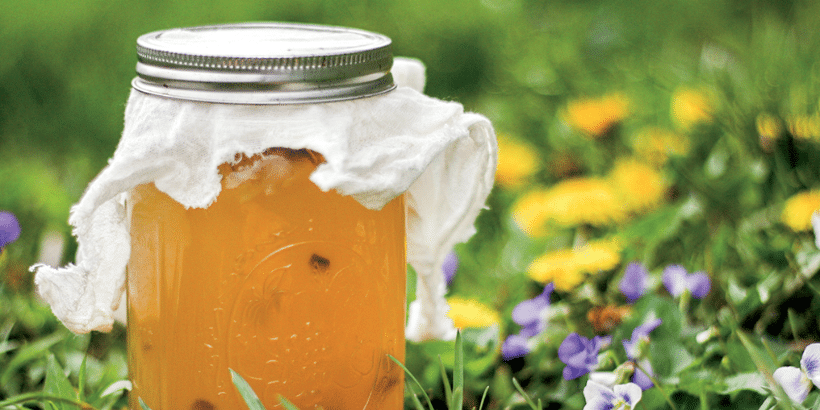
Cysers, melomels, pyments and more! Fermenting mead is an ancient practice — one that is as just as rewarding now as then.
Fruit-based and flower meads offer an exciting way to explore unique flavors in home brewing. Whether using wild fermentation or commercial yeast, adding fruit enhances your mead, creating a refreshing and aromatic drink for any occasion.
Learn the ins and outs of brewing fruit-based and flower meads, from foraging to fermenting!
The following excerpt is from Make Mead Like a Viking: 10th Anniversary Edition by Jereme Zimmerman. It has been adapted for the web.
Fruit-Based and Flower Meads
A melomel is simply a fruit-based mead. But the revered Namers of Mead Styles apparently don’t like to keep things simple. If you make a mead with apples, you have cyser, which is similar to cider. A pyment is a grape-based wine that uses honey for its fermentable sugar or, if you prefer, a grape mead.
Since the technique is similar for nearly any type of melomel, I’ll provide the basic process and a couple of recipes and variations. Summer is a great time to start preparing for fruit-based meads, as the profusion of fresh fruit available provides an abundance of options. If you don’t have the time to make mead during the busy harvest season, you can freeze some fruits and store others in a dark, cool area until you’re ready to use them.
You can add most fruit whole to the must, but for larger fruits you’ll need to chop and remove the skin (if it’s bitter or inedible). It is generally not necessary to juice the fruit first, as the fermentation process works wonders for getting to its essence.

A 1-gallon batch of wild-fermented flower (wild
violet, rose of Sharon, dandelion, and elderflower) mead happily bubbling away.
You can add as much fruit as you’d like to these recipes without worry. Unlike spices and some botanicals, excess fruit doesn’t risk overpowering the mead (at least not in an unpleasant way). The more fruit you add, the less honey you’ll need, as fruit provides plenty of its own sugar.
When I asked wild-fermentation expert Sandor Katz about his preferred ratios for fruit meads, he told me that he generally does about a 1:8 honey-to-water ratio for meads that are essentially a bunch of fruit covered with a honey-water mix. For “a substantial amount of fruit but not that much,” he goes with a 1:6 ratio.
For all his meads, he starts with a 1:4 ratio when working with just honey and water and modifies from there based on what other sugars he adds.
Keep in mind that many fruit meads won’t taste much like the fruit they’re made from once fully fermented if you only add fruit with the initial fermentation.
If you want a stronger fruit flavor, add more after primary fermentation has commenced, and continue to add with each racking until you’re satisfied. This isn’t to say you need to make an overpowering fruit mead. Some people, myself included, prefer most of their melomels to have just a touch of fruit flavor with each sip.
Berry Melomel
Almost any kind of mild to sweet berry can be used to make this mead. Feel free to combine berries for a berry-medley melomel. If you add tart berries to the mix, take care to not overdo it unless you’re the sort who likes a good pucker. Berry meads are well suited for wild fermentation, as the plethora of yeast on the berries and in the honey inevitably makes for a vigorous fermentation. You can also finish off melomels with a commercial yeast. Elderberries make for particularly flavorful berry melomels.
INGREDIENTS AND PROCESS FOR 5 GALLONS (20 LITERS)
- Pick and de-stem as many berries as you can. The best way to de-stem small berries like elderberries is to freeze them and work while they’re frozen. Try to get all the stems. It won’t hurt if a few make it in, but too many can cause an excess of tannins. Place the berries in a bowl with enough water to cover them. Any overripe berries will float, along with leaves, insects, and other crud.
-

When you’re making elderberry mead, pour stemmed berries into a bucket or pot of water, and skim off any that float to the top.
Remove unwanted materials with a strainer, pour off the water, and add as many berries as you desire to a 5- to 6-gallon (20- to 24-L) bucket or crock, saving a pound or two for secondary fermentation if you want a strong berry flavor. Alternatively, if you’ve been extra careful when de-stemming, go ahead and dump everything in a pot of warm water, skim off any berries that float, mix in your desired amount of honey (see below), and proceed.
- If you fill the fermenter three-quarters full or more, prepare a 1:8 honey-water mix and pour it over the berries until they’re just covered. If you only fill it a quarter to half full, go with a 1:6 mix. Use a light to medium honey to draw out the flavor of the berries.
- Most fruits will contain some degree of acid, but it doesn’t hurt to add a cup or two of orange juice. Inevitably, elderberries will provide a fair amount of tannin, so don’t feel you should add extra. Adding 15 to 20 raisins for wild yeast and nutrients isn’t a bad idea, though.
- Stir and lightly mash the berries into the must and cover the fermenter with cheesecloth. Continue to stir whenever you get a chance, but most fruit meads tend to take off pretty quickly with minimal stirring.
- Be sure to place the fermenter in a container that will catch any overflow, or be prepared to clean up a mess. You can also put this straight into a carboy, but don’t fill it any more than three-quarters until it’s had at least a week to finish fermenting. It’s also a good idea to use a blow-off tube rather than an airlock. To do this, take the stopper, put a siphoning tube through the hole, and submerge the other end of the tube in some water.
- Two or three weeks after initiating fermentation, rack into a carboy, leaving most of the berries behind, and add as many more berries as you wish for flavoring, keeping in mind that they will cause additional fermentation.
- Rack every couple of months until the mead is the color of a nice, clear juice and bottle when ready. Berry meads are great candidates for bottling early (within six months) in thick-glass bottles for a carbonated fruit mead.


This elderberry melomel required a blow-off tube and room in the carboy for initial fermentation. Once it died down, the author added more honey-water, let it age for a couple of months with the berries, and then racked it off the berries and lees.
Cabin Fever Cyser
At its core, cyser is simply fermented cider and honey. To the Norse, fruit was a symbol of the bounty of short summers as well as of immortal youth and beauty. The Norse goddess Idun was lighthearted and full of beauty. She personified the continual rebirth of spring and was therefore always beautiful and young. Fittingly, she was courted by and eventually married Odin’s son Bragi, who personified music and poetry, and was also eternally young. Bragi was often called upon by skalds, who were sometimes known as Braga-men or Braga-women.
His name was toasted at festive occasions such as Yuletide celebrations or funeral feasts, accompanied by a vow to accomplish some great deed in the upcoming year. Hence, his name came to be the root word of verb brag. Idun’s fruits, represented by apples in most versions of the myth after their introduction in the Middle Ages, were precious to the Norse, and she was reputed to greet the gods in Asgard daily with a basket of apples that bestowed immortal youth and a touch of beauty to all who ate them.
Up through the early 20th century, cider (and to a degree, cyser) was a common farmhouse product due to the abundance of apples in agrarian societies. Even through the 1970s, the most common way to make cider or cyser was through wild fermentation. Apples from orchards that don’t use pesticides teem with wild yeast and bacteria, much of it favorable to producing complex flavors.
While any type of apple juice can be fermented into cyser, some apples impart much better flavor than others. Generally you should seek to blend two or more varieties of sweet and tart apples, depending on what type of flavor profile you’re seeking. The quality and ripeness of the apples you pick, along with the honey you use, will be the ultimate deciding factor.

The essential equipment for making 5-gallon (20-L) batches of mead.
In The Cheeses and Wines of England and France, author John Ehle sums up his method for selecting apples for cider: “The sharp class of apples contains a high percent of total acid, but almost no tannin . . . The sweet class of apple normally has less acid but more tannin. Finally, the bittersweet apples contain a great deal of tannin, normally exceeding .2 percent. A mixture of these apples can yield a cider balanced in acid (about .6 percent), and tannin (.10 to .15).” Of course, when making cyser, take note that you will have an excess of sweetness to consider.
As with other types of mead, don’t fret too much. Work with what you can obtain and don’t overthink it. Claude Jolicoeur, author of The New Cider Maker’s Handbook and a mechanical engineer by profession, suggests the “Keep it simple, stupid” (KISS) engineering-design principle, or as ethnobotanist and mead maker Marc Williams likes to put it, “Keep it simple, sweetheart.” Following are the core tips (I just can’t get enough of those core puns) you should consider in gathering and selecting apples:
- Pick as many as possible, at least three bushels for a 5-gallon (20-L) batch.
- Choose apples from small, traditional orchards rather than commercial operations.
- If you grow your own apples or talk to the arborist or property owner of the orchard you pick from, select older trees and those that have been minimally fertilized (too much nitrogen leads to increased water and thus decreased juice).
- Don’t just go for the “perfect” apples; scabs, evidence of insects or worms, or a bit of rot are common in naturally grown fruit (just be sure to take the time to cut off any bad parts and remove any worms before juicing).
- Look for late-maturing apple varieties and pick near the end of the season.
- Leave apples to “sweat” in a cool, dry place for several weeks before juicing; when they’re soft to the touch, they’re ideal for cyser. Although these are all tips I agree with, I should note that this list was paraphrased from a more comprehensive list in Jolicoeur’s book
I don’t always have time to juice apples during the hectic harvest season, so one thing I’ll often do is store my apples in my deep freezer in trash bags. This also softens the apples up when you thaw them, making for easier pressing or juicing. If you don’t have access to a press, you can use a kitchen juicer, but be sure it is a high-powered one. My Acme Supreme Juicerator works well, but does require that I change the filter between every quart or two of juice. The alternative to these options is to simply purchase apple cider (not juice) to ferment.
I’ll often buy 1-gallon batches and ferment straight in the jug. Cider with no preservatives, particularly when mixed with raw honey, provides an ideal environment for wild fermentation (even in a narrow-neck jug with the cap off ). It can’t get quicker and easier than that.
John Ehle sums up the simplicity of making cider naturally: “In the old days in England, the ciders were made on farms, just as were cheeses . . . The fruit was not washed. The yeasts were on the peels, after all. And the juice was not sulfited. The natural yeasts and bacteria were left to do their work.
The English makers thought to be the best of that time also prided themselves on not adding water or sugar. They simply crushed the fruit and let the yeast convert the sugar into alcohol. That was all.” I would add to his statement that excess honey or brown sugar is helpful to add if you want some residual sweetness in cyser while still keeping to the simplicity of farmhouse brewing.
INGREDIENTS FOR 5 GALLONS (20 LITERS)
- 2 bushels of a quality, late-season, high-sugar, medium-acid apple variety
- 1 bushel of one or more additional varieties of apples
- 6–8 pounds (3–4 kg) honey
- 1 pound (.5 kg) dark brown sugar (optional)
- 1 gallon (4 L) water 1 cup (240 mL) raisins
- 1 teaspoon (5 mL) yeast nutrient (another cup of raisins should also work, but keep in mind that cyser requires a lot of nutrients)
- 1 5-gram packet Lalvin ICV D-47 yeast (or a champagne yeast for a dry cyser), or wild yeast
PROCESS
- Prepare at least 4 gallons (16 L) of apple juice.
- Add the juice to a wide-mouth or narrow-neck fermentation vessel (open fermentation isn’t required due to the strong presence of wild yeasts on the apples).
- Mix the honey, sugar, and water, and blend it with the juice.
- Add the raisins and nutrient and stir well to aerate.
- Sprinkle the yeast on the surface of the must and stir again, or proceed with wild fermentation.
OPTIONS AND RACKING SUGGESTIONS
For the most part, you can proceed from here as with any other mead. Whether you wild ferment or not, it is a good idea to leave 4 to 6 inches (10–15 cm) of head space in your initial fermenter, as cyser tends to ferment vigorously. It also produces a lot of sediment, so you’ll need to rack a few times. Once the initial fermentation subsides and you’ve racked for the first time, fill the head space with more cider or with a honey-water mix. Additional ingredients that you may consider are: tart fruit such as cranberries or persimmons, and spices such as cinnamon, cloves, nutmeg, or cardamom.

Cysers and other fruit meads will often produce large amounts of krausen (foam) due to the multitude of yeast on the skins of the fruit.
If you don’t have the time for the full method and just want to make a quick, simple cyser, here’s what to do:
- Buy a gallon (4 L) of quality, natural cider and pour about a pint out to drink or save for racking.
- Add a cup of honey mixed with water (you’ll need to remove more cider to do this) for cyser, or leave the honey out and proceed with a normal cider.
- Add 1 packet (5 g) of a sweet wine or champagne yeast, or simply leave to wild-ferment.
- Add a handful of raisins.
- Put the lid on loosely or cover with plastic wrap.
- Rack as needed until fermentation has subsided, usually about six months.
- Bottle and age for one to two months.
- At any point during this process, don’t be afraid to taste it and, if you like it, drink it all up while sweet, young, and frothy
Flower Mead
The process for making flower meads isn’t that different from the process for melomel or other wild-fermented meads. You can also combine flower petals with fruits and a floral honey for a particularly divine mead that will be oozing with light, summery flavors.

Straining a flower mead made from wild violet, rose of Sharon (hibiscus), and dandelion.
INGREDIENTS AND PROCESS FOR 5 GALLONS (20 LITERS)
- When the first flowers bloom in the spring, take every chance you can to start gathering flower petals. Be sure you pick flowers you know to be edible, and avoid picking from beside roads or areas that may have been treated with insecticides. Only use the petals; the stems and sepals (the green part in the center that holds pollen) can cause excessive bittering.
- When you’re ready to make some mead, set the flowers out the day before to thaw (see the “Flowers for Flower Mead” sidebar), laying them flat or placing them in a colander. Don’t leave them for more than a day or they’ll start to wilt and mold. You can also steep them in hot water, but don’t boil the water if you want to make a wild ferment.
- Mix a ratio of honey to water appropriate for a dry, semisweet, sweet, or sack/dessert mead, add fruits or other desired ingredients, and proceed as with any wild ferment. Be sure to add 1 cup of orange juice per gallon (4 L) or the juice of one lemon, as well as 10 to 12 raisins: Floral meads need just a bit of help to get the yeast working and fully extract the desired flavors.
Use the following list for tips on flowers to use
The measurements are the minimal suggested amounts per 1-gallon (4-L) batch. For any of these, you can substitute about ½ ounce (14 g) of dried petals per pint (475 mL) of fresh. For wild yeast, add a small handful of flowers during initial fermentation. To get the full flavor of the flower, wait until secondary fermentation. Add an ounce or two at a time and taste-test during rackings if you want to really fine-tune the flavor.
- Dandelion: 2–3 pints (950–1420 mL)
- Elderflowers: ½–1 pint (240–475 mL)
- Wild violets: 2–3 pints (950–1420 mL)
- Marigold: 1–2 quarts (1–2 L)
- Honeysuckle: 1–2 pints (475–950 mL)
- Roses: 2–3 ounces (57–85 g) (flavoring of varieties varies drastically)
- Gorse: 2–3 pints (950–1420 mL)
- Hawthorn (mayflower): 1–2 pints (475–950 mL)
- Rose of Sharon (hibiscus): 2–3 quarts (2–3 L)
- Lavender: 1–2 pints (475–950 mL)
- Purple clover: 2–3 pints (950–1420 mL)
.
Recommended Reads
In Search of Wild Yeast: Using Foraged Yeast to Create Your Own Brews
Read The Book

Make Mead Like a Viking 10th Anniversary Edition
Traditional Techniques for Brewing Natural, Wild-Fermented, Honey-Based Wines and Beers
$24.95
You may like...
-
$29.95
-
$34.95
-
$34.95


Recent Articles

Fermenting mead is an ancient practice. With step-by-step instructions, learn how to brew fruit-based and flower meads, from foraging to fermenting.
Read More
Small But Mighty! Crab Apples are easy to find, simple to store, and incredibly flavorful. Keep reading to learn more about the unsung heroes of the apple family.
Read More
Try your hand at preserving veggies by freezing them! Freezing vegetables is a quick, simple way to preserve them for winter meals.
Read More
Add a rich and robust twist to your meals with help from red wine salt! This seasoning is a perfect addition to dishes like short rib, potatoes, and more.
Read More
Raspberries: they’re sweet, flavorful, and extremely versatile. Forage for raspberries yourself and use them to create delicious dishes!
Read More