Simple Sugars & The Sweet Side of Fermentation
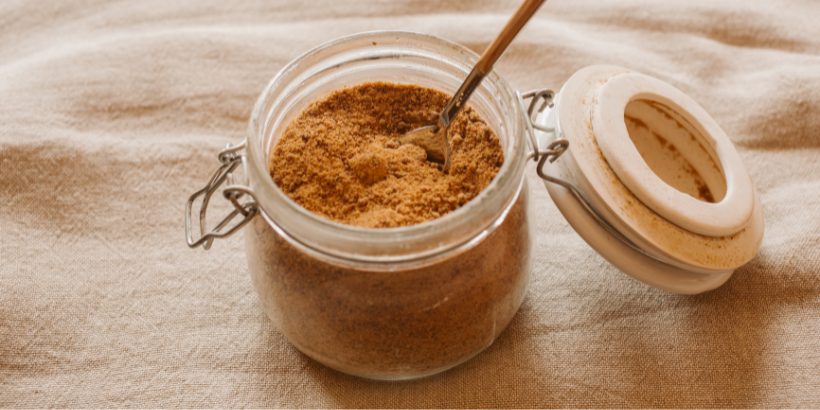
As the name suggests, simple sugars are very easy to work with — especially when used as a ferment.
From tepache in Mexico to mauby/mabí in The Caribbean, fermented simple sugars are often used to create delicious beverages all around the world.
The following is an excerpt from Sandor Katz’s Fermentation Journeys by Sandor Ellix Katz. It has been adapted for the web.
The Role of Simple Sugars
I like to start with the simplest of ferments—sweet simple sugars that yeast and bacteria can effortlessly access and metabolize into alcohol and acids. With sugary fruits, plant saps, and diluted honey or sugar, fermentation is a spontaneous phenomenon: utterly unstoppable.
Anyone who has ever harvested an abundance of any kind of fruit has discovered that some of it, inevitably, is already fermenting. Squeeze the juice out and it will all start to ferment, quickly.
Fermenting Plant Saps
Plant saps readily ferment as well, once you extract them from the plant. Honey does not ferment so long as it remains free of water, but the addition of even small amounts of water enables the yeasts that are always present in raw honey to ferment its sugars and turn it into mead.
Even if you are working with honey that has been heated or refined sugar that has surely been cooked, yeasts are everywhere around us and will find their way to any available sugars.
The sources of the sugars that people ferment into alcohol and more lightly fermented beverages vary around the world.
The Sweet Side of Fermentation
As mentioned previously, before I was specifically interested in fermentation, I enjoyed palm wine in West Africa. Many years later, when I was better informed about how it is made, I encountered palm wine again, in a couple of different forms, in Southeast Asia.
In Mexico, I learned about the importance of the dryland succulent plant maguey (or agave) and the elaborate cultural traditions around its processing into pulque and mezcal. I’ve witnessed different methods of fermenting pineapples—into tepache and guarapo de piña—in Mexico and Colombia.
In Italy, I harvested grapes to make wine, and I have encountered passionate winemakers around the world. I have learned about persimmon vinegar (and pickles made from the residue!), mauby, and fruit enzyme drinks. And, of course, I’m still making mead.
Wherever there is an abundant carbohydrate source, people likely have a method for fermenting it. In this chapter, I share what I have learned about this realm of fermentation.
RECIPE: Tepache
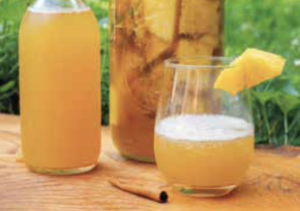 Tepache is a wonderful, effervescent, lightly fermented pineapple beverage popular in Mexico.
It is made from the skins and core of pineapple; you can enjoy the fresh pineapple flesh and also make use of the parts typically discarded in order to enjoy it over a longer period of time.
Time Frame: 2 to 5 days
Vessel: Wide-mouth vessel of at least 1/2-gallon/2-liter capacity with lid or cloth to cover
Ingredients
(for about 1 quart/1 liter):
- 1/2 cup/100 grams sugar (or more, to taste)*
- Peel and core of 1 pineapple (eat the rest of the fruit!), cut into 1- to 2-inch/3- to 5-centimeter pieces
- 1 cinnamon stick and/or a few whole cloves and/or other spices (optional)
*ideally piloncillo, panela, or another unrefined sugar, but any type of sugar will work
Process:
- Dissolve the sugar in about 1 cup/250 milliliters of water.
- Place the pineapple skin and core pieces and the optional spices into the vessel.
- Pour the sugar water over the pineapple, then add additional water as needed to cover the pineapple.
- Cover with a loose lid or cloth, and stir daily.
- Ferment for 2 to 5 days, depending upon temperature and desired level of fermentation. It will get fizzy, and then develop a pro- nounced sourness after a few days.
- Taste each day after the first two to evaluate developing flavor.
- Once you are happy with the flavor, strain out the solids. Enjoy fresh or refrigerate for up to a couple of weeks.
If it gets too sour, do not despair! After straining out the solids, leave it with its surface exposed to airflow and it will become pineapple vinegar after a week or two.
What Is Mauby?
When I visited the Caribbean island of St. Croix, I knew to be on the lookout for mauby — mabí in Spanish — a lightly fermented soft drink made from the bark of the mauby tree (Colubrina elliptica or soldierwood) and enjoyed in many Caribbean lands.
Mauby is bitter, sweet, and very bubbly due to the saponins in the bark. People flavor it with different spices: cinnamon, nutmeg, mace, star anise, ginger, and beyond.
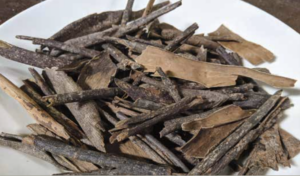 Years earlier I had made a couple of batches as best I could, without ever having tasted it before, using bark and instructions that were mailed to me by a Puerto Rican reader of Wild Fermentation.
How to Start Mauby
The only problem was, she didn’t know how I would be able to start the mauby, which is typically started by backslopping from a previous batch.
I improvised using water kefir, with great results. My experience is that starters—especially in the realm of lightly fermented sweet beverages—are largely interchangeable.
At the Saturday morning farmers market in St. Croix, I was very excited to find a woman selling her homemade mauby.
It was bottled in reused plastic beverage bottles, bulging with the pressure of fermentation. The cold mauby was delicious and refreshing in the hot weather there!
RECIPE: Mauby/Mabí
I managed to bring a small bottle home with me to use as a starter, and I’ve kept a little (in the refrigerator) from each batch I’ve made since then, backslopping continuously for a decade now.
Time Frame: 3 days to 1 week
Vessel: Crock or another vessel with at least 1-gallon/4-liter capacity OR reused plastic soda bottles/other sealable bottles. Plastic has the benefit of allowing you to feel how pressurized the bottles of mauby are becoming, so you can refrigerate bottles to avoid explosions.
Ingredients:
for 1 gallon/4 liters
- 1 cup/40 grams mauby bark, loosely packed
- Small amounts of roots such as licorice and/or ginger, and/or spices such as cinnamon, star anise, clove, and/or allspice (don’t be afraid to experiment!)
- Pinch of salt
- 2 cups/400 grams sugar (to taste)+
- 1 cup/250 milliliters of a previous batch of mauby, water kefir, ginger bug, or other active starter, or even a pinch of yeast
*available in Caribbean markets and via the internet
+ideally in a less-refined form such as panela or jaggery, but any sugar is fine
Process:
- Simmer the mauby bark and any additional roots or spices in about 1/2 gallon/2 liters of water for at least 1/2 hour, or as long as 1 hour or more, to make a flavor concentrate.
- Strain the mauby and spice decoction into the fermentation vessel.
- Add the salt and sugar, dissolving in the hot liquid.
- Add cold water to bring total volume to 1 gallon/4 liters. (It will take more than 1/2 gallon because some of the original 1/2 gallon you started with will have evaporated or absorbed into the bark and spices.)
- Add the starter. Stir well, cover to protect from flies, and ferment for a few days.
- Stir a few times each day.
- Once it seems to be getting bubbly (generally faster in a warm climate or with a vigorous starter), bottle it. Be sure to save some in a jar that will become the starter for your next batch! Transfer the rest into sealable plastic bottles so you can feel the pressure and gauge the level of carbonation.
- Ferment the starter jar and plastic bottles overnight or for a couple of days, until the bottles feel pressurized.
- Refrigerate the mauby and enjoy cold. Starter can be stored in the refrigerator for a year or longer.
Recommended Reads
Recent Articles
Chances are, you’ve seen cattails growing on the edge of your local lake or stream at least once or twice. Instead of just passing these plants, try foraging for and cooking them to create delicious seasonal dishes! The following excerpt is from The New Wildcrafted Cuisine by Pascal Baudar. It has been adapted for the…
Read MoreGarlic mustard: while known as “invasive,” this plant can be consumed in its entirety and has great nutritional value. Plus, the garlic-flavor is a perfect addition to any recipe that calls for mustard! The following are excerpts from Beyond the War on Invasive Species by Tao Orion and The Wild Wisdom of Weeds by Katrina…
Read MoreOh, honeysuckle…how we love thee. If only there was a way to capture the sweet essence of this plant so we could enjoy it more than just in passing. Luckily, foraging and some preparation can help make that happen! Here’s a springtime recipe that tastes exactly like honeysuckle smells. The following excerpt is from Forage,…
Read MoreIntroducing…your new favorite brunch dish! This whole broccoli frittata is packed with fresh, wildcrafted flavors that are bound to help you start your day off on the right foot. The following is an excerpt from The Forager Chef’s Book of Flora by Alan Bergo. It has been adapted for the web. RECIPE: Whole Broccoli Frittata…
Read MoreWondering where to forage for greens this spring? Look no further than hedges, which serve as natural havens for wild greens and herbs! The following is an excerpt from Hedgelands by Christopher Hart. It has been adapted for the web. Food from Hedges: Salads and Greens Let’s start by looking at all the wild foods…
Read More


