How to Brew Amazing Beer in Vast Quantities
Wouldn’t it be cool if, after some time and practice, you’re known as the Beer Brewing Master? Your friends gather at your house every weekend to try your latest ferment, eyes filled with wonder. Your homebrewing skills unmatched by all.
Sandor Ellix Katz, author of Wild Fermentation: The Flavor, Nutrition, and Craft of Live-Culture Foods, will help you attain that new level of cool.
The following is an excerpt from the first edition of Wild Fermentation by Sandor Ellix Katz. It has been adapted for the web.
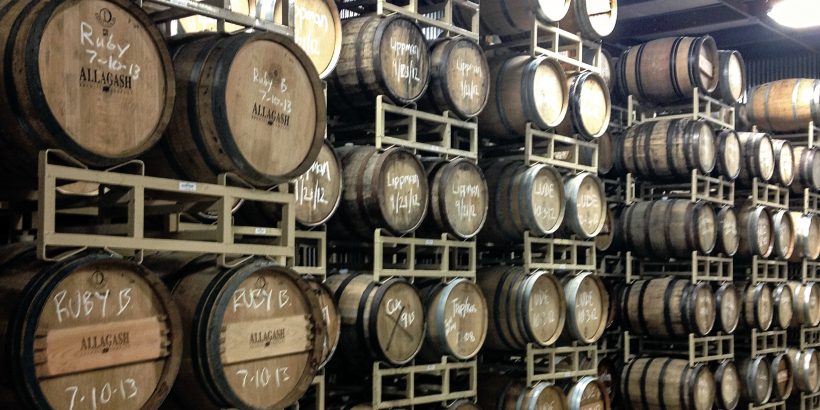
(Barrels of aging beer at Allagash Brewing Company in Maine. Photo curtesy of Sandor Ellix Katz.)
Learn to Brew Amazing Beer
My friend Patrick Ironwood brews amazing beers in vast quantities. Patrick lives at Moonshadow, a homestead he shares with four generations of his family, including his two grandmothers, his parents, his wife, his brother and sister-in-law, and his newborn baby Sage Indigo Ironwood (three plant names!), as well as friends, interns, and visitors. The Kimmons-Ironwood clan’s woodland homestead is also home to an environmental education center, the Sequatchie Valley Institute. Patrick has been brewing since age fifteen, when his parents gave their budding do-it-yourselfer a homebrew kit and he made his first batch of beer for them.
Twenty years later, Patrick generally brews in 30-gallon (120-liter) batches and stores his beer in kegs, which involves much less work than bottling. After years of enjoying Patrick’s beer, I recently assisted him as he brewed a batch. I’ll describe his process adapted to a 5-gallon (20-liter) quantity.
Beer from Malted Grains
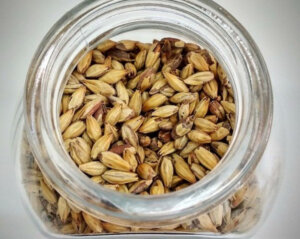
For the mashing process, an accurate thermometer is essential. The mash is heated and held at successively higher temperatures. The malted grains contain enzymes that behave differently at different temperatures. Mashing for periods of time at different temperatures gives the enzymes the opportunity to convert starches into sugars in several different modes, producing a wort that will ferment into a complex-flavored beer.
 TIMEFRAME:
About 10 days
INGREDIENTS (for 5 gallons/20 liters):
2 pounds/1 kilogram pale malted barley
1 pound/500 grams Cara Munich malted barley
3 pounds/1.5 kilograms amber barley malt syrup
2 pounds/1 kilogram amber barley malt powder
3 ounces/85 grams Chinook pelletized hops
3⁄4 teaspoon/4 milliliters Irish moss
1 packet beer yeast
PROCESS:
1. Coarsely grind the malted barley. Just crack each grain into a few chunky pieces to increase surface area; do not grind it into flour, which would make the mash pasty and cause problems.
2. Heat 2 gallons (8 liters) water in a large pot to around 160°F (71°C). Add the barley and stir well. Room-temperature barley will cool the mash. Check the temperature; we are aiming to hold the mash at 128°F (53°C). Either add cold water or continue heating until the mash reaches 128°F (53°C). Then cover, turn off the heat, and leave at this temperature for 20 minutes.
3. After 20 minutes, heat the mash to 140°F (60°C). As you heat, stir constantly so grain at the bottom won’t burn. Once you reach 140°F (60°C), cover, turn off the heat, and leave at this temperature for 40 minutes. After 20 minutes, check the temperature and reheat if it has dropped more than a couple of degrees.
4. After 40 minutes at 140°F (60°C), heat the mash to 160°F (71°C), where it will remain for 1 hour. Check the temperature every 20 minutes and reheat as needed to maintain temperature.
5. After 1 hour at 160°F (71°C), heat the mash to 170°F (77°C), stirring constantly.
6. Meanwhile, boil about 1 gallon of water.
7. After mash reaches 170°F (77°C), strain it. Set a colander in a large pot or crock and scoop the mash—grains and liquid—into the colander. As the colander fills with grain, press it with a potato masher or other kitchen implement to release liquid. Once the liquid is pressed out, pour a few cups of boiled water over the grains to rinse off additional sweet residue. This procedure is called “sparging”. Press the grains and repeat the process. After sparging, spent grains can be fed to chickens or composted. Repeat this process until all the mash has been strained and you are left with just sweet, fragrant liquid, now called “wort”.
8. Return the wort to the cooking pot and heat to a boil. Add the malt extracts and stir. This thick, concentrated wort could burn, so keep stirring. Once it returns to a boil, add half the hops. Boil with the hops for 45 minutes; keep stirring.
9. After 45 minutes, add the Irish moss, which helps clarify the beer. Five minutes later, add half the remaining hops; eight minutes after that, add the rest of the hops. Boiling hops extracts bitterness but cooks off some of volatile aromatic qualities. Adding hops toward the end of the process (these are known as “finishing hops”) releases these volatile aromatics into the beer.
10. Once the wort has boiled for 1 hour, turn off the heat. Strain the wort into a carboy or other fermenting vessel. Patrick uses a 3 percent hydrogen peroxide solution to sterilize his fermentation vessels. If you are working with a glass carboy, add the hot wort slowly to avoid shocking and shattering the glass. Top off with additional water to make 5 gallons (20 liters). Be sure to leave a few inches of head space for the beer to foam, and seal with an airlock until beer cools to body temperature.
11. Once the beer cools, sprinkle on the yeast and seal with the airlock. Ferment about 1 week to 10 days, until it stops bubbling. Prime and bottle as described above.
Recommended Reads
Recent Articles
Chances are, you’ve seen cattails growing on the edge of your local lake or stream at least once or twice. Instead of just passing these plants, try foraging for and cooking them to create delicious seasonal dishes! The following excerpt is from The New Wildcrafted Cuisine by Pascal Baudar. It has been adapted for the…
Read MoreGarlic mustard: while known as “invasive,” this plant can be consumed in its entirety and has great nutritional value. Plus, the garlic-flavor is a perfect addition to any recipe that calls for mustard! The following are excerpts from Beyond the War on Invasive Species by Tao Orion and The Wild Wisdom of Weeds by Katrina…
Read MoreOh, honeysuckle…how we love thee. If only there was a way to capture the sweet essence of this plant so we could enjoy it more than just in passing. Luckily, foraging and some preparation can help make that happen! Here’s a springtime recipe that tastes exactly like honeysuckle smells. The following excerpt is from Forage,…
Read MoreIntroducing…your new favorite brunch dish! This whole broccoli frittata is packed with fresh, wildcrafted flavors that are bound to help you start your day off on the right foot. The following is an excerpt from The Forager Chef’s Book of Flora by Alan Bergo. It has been adapted for the web. RECIPE: Whole Broccoli Frittata…
Read MoreWondering where to forage for greens this spring? Look no further than hedges, which serve as natural havens for wild greens and herbs! The following is an excerpt from Hedgelands by Christopher Hart. It has been adapted for the web. Food from Hedges: Salads and Greens Let’s start by looking at all the wild foods…
Read More


