

Crunchy Candied Tree Leaves: A Natural Fall Dessert Topper

Instead of raking and throwing away fallen leaves this autumn, what if we repurposed them and turned them into something beautiful & delicious? Embrace the natural flavors of fall with this recipe for candied tree leaves.
The following recipe is from The New Wildcrafted Cuisine by Pascal Baudar. It has been adapted for the web.
RECIPE: Crunchy Candied Tree Leaves
I always wanted to do something with tree leaves, but very often they’re not palatable—they’re either too bitter or too tough to eat. With this method you can turn many types of non-poisonous tree leaves into crunchy, sugary, and tasty dessert decorations.
You must think ahead, though: This procedure takes 5 days from start to finish.
Ingredients
- A few non-toxic tree leaves (willow, cottonwood, and others)
- Water
- 1⁄2 teaspoon (3 g) salt
- 1 and 3⁄4 cups (350 g) sugar
- Flavoring ingredients: lemon slices, a couple of fresh ginger chunks, wild aromatic herbs
 Procedure
 Procedure
- Wash the leaves and place them in a pot with the water. Add the salt and bring to a boil. Reduce the heat and simmer the leaves for 15 minutes. Change the water and repeat the procedure for another 15 minutes. This will remove most of the bitter taste in the leaves.
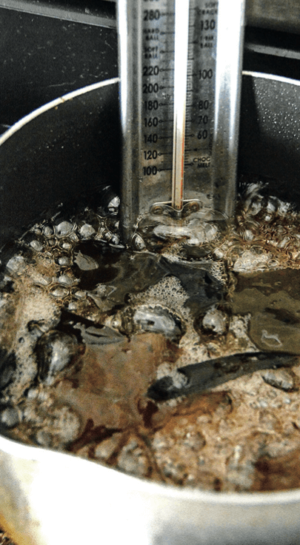
- Drain the leaves. Add 3 cups (750 ml) water and the sugar to the pot. Heat the syrup solution to a boil, add the leaves, and bring to a light simmer. Cook for 20 minutes. Remove from the heat and let stand overnight.
- Day 2: Bring the leaves and syrup to a boil. Turn the heat down and simmer lightly for 20 minutes. Remove from the heat and let stand overnight.
- Day 3: Bring the leaves and syrup to a boil again. Turn the heat down and simmer lightly for 20 minutes. Remove from the heat and let stand overnight.
- Day 4: This is the time to add ingredients such as lemon slices, ginger, and wild aromatic herbs to flavor the leaves. I usually add 3 to 4 lemon slices, a couple of ginger chunks, and a couple of white sage leaves to the syrup and then repeat the previous instructions: Bring the concoction to a boil, then simmer lightly for 20 minutes. Remove from the heat and let stand overnight.
- Day5: Preheat the oven to 340°F (171°C). Bring the leaves and syrup to a simmer and cook until the temperature reads 240°F (115°C).
- Using a fork or spoon, carefully remove the leaves from the syrup, placing the leaves on a plate. Using a rubber spatula, remove excess syrup from the leaves and lay them carefully on a piece of parchment paper or a silicone baking pad.
- Bake the leaves for 2 to 3 minutes, then remove them from the oven and place them on a fresh sheet of parchment paper. Let dry for 30 minutes. I usually use them the same day, but they should keep for days in dry conditions. Humidity will make them softer (not a good thing).
Recommended Reads
Seasonal Desserts: Apple Spice Bundt Cake & Pumpkin Pie with Hazelnut Crust
Read The Book

The New Wildcrafted Cuisine
Exploring the Exotic Gastronomy of Local Terroir
$40
You may like...
-
$32.95
-
$39.95
-
$40.00


Recent Articles

Try your hand at preserving veggies by freezing them! Freezing vegetables is a quick, simple way to preserve them for winter meals.
Read More
Add a rich and robust twist to your meals with help from red wine salt! This seasoning is a perfect addition to dishes like short rib, potatoes, and more.
Read More
Raspberries: they’re sweet, flavorful, and extremely versatile. Forage for raspberries yourself and use them to create delicious dishes!
Read More
This summer vegetable tian is the perfect easy side dish. Layers of eggplant, zucchini, tomato, & red onion make this dish healthy, colorful, and delicious!
Read More
Squash newbies, this one’s for you! Learn how to harvest, cure, and store squash with these tried-and-true techniques from gardening expert Carol Deppe.
Read More