A Guide to Curing Vegetables for Storage
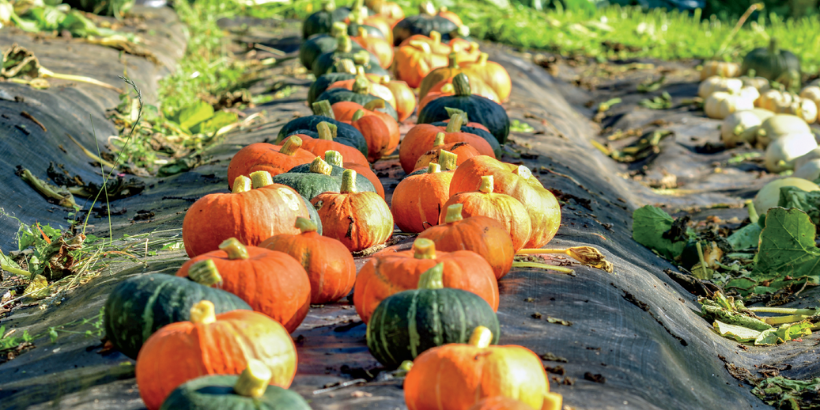
Got a bountiful harvest? Now, keep it fresh for months to come! Proper storage is crucial to ensuring that your produce stays fresh and retains its nutritional value.
Curing involves placing vegetables in a warm, dry, and well-ventilated area for a few days to allow their skins to toughen and minor wounds to heal. This process helps extend their shelf life and preserve their quality after harvesting.
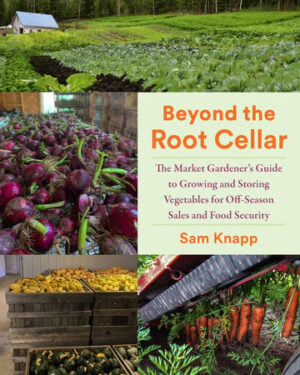
The following excerpt is from Beyond the Root Cellar by Sam Knapp. It has been adapted for the web.
Photo courtesy of Phil Knapp.
Curing
Curing is a general term describing the extra steps that prepare certain vegetables for storage. Most veggies don’t need any curing prior to storage. The few that do include winter squash and pumpkins, potatoes, sweet potatoes, and alliums like onions, garlic, and shallots. The conditions needed for curing and the physiological changes that occur are different for each vegetable/group.
For winter squash and pumpkins, curing helps to harden their skin, heal wounds, dry down their stems, and turn starches into sugars like sucrose and glucose. (The correct and lively term for that bit of plant tissue connecting a squash fruit to the vine is peduncle.)
In some climates, winter squash and pumpkins can cure in the field, but in some regions, farmers need to create the appropriate conditions.
Holding squash at 75 to 85°F (24 to 29°C) and 50 to 70 percent relative humidity (RH) for a week or two usually completes the curing process and improves their performance in long-term storage. (Note that not all types of squash need curing, and a separate curing step isn’t necessary in all climates.)
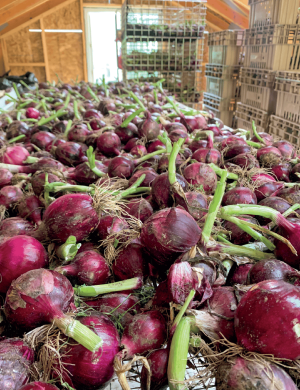
Onions cure in the attic of the storage building at Offbeet Farm, where it’s dry and warm, especially on sunny days.
Though potatoes and sweet potatoes are from entirely different plant families, the physiology behind their curing is similar. Both crops go through a process of suberization while curing, whereby a waxy protective layer forms over the skin and wounds.
This layer prevents moisture loss and protects against infection from bacteria and fungi. Common wisdom says that skins thicken during the curing process, but in reality, the outermost skin layers just attach more firmly to the tissue underneath. While potatoes can cure under a range of conditions, a temperature between 54 and 59°F (12 and 15°C) is best for speed and preventing pathogen growth. The humidity should be high, at about 80 percent. Sweet potatoes require a similar humidity but much warmer temperatures, ideally between 82 and 86°F (28 and 30°C).
Garlic and onions, including shallots, can cure once they’ve fully matured and have entered a state of dormancy.
Warm and dry conditions over several weeks dry out their outermost scales, which become hard and flaky. Although they can cure in a wide range of temperatures and humidities, optimal conditions range from about 80 to 90°F (27 to 32°C) and 50 to 70 percent RH. The dry outermost layers protect onions and garlic from water loss and pathogens. In both onions and softneck garlic, it’s also important that the necks dry and contract during the curing process to prevent the entry of pathogens.
When I was first starting out, curing seemed a bit like alchemy to me.
I read the advice from university extension services, but I didn’t fully grasp the importance of curing to success in long-term storage. My first failure came with onions, which I grew for my winter CSA during the first year of Root Cellar Farm.
I started them from seed and diligently tended them under borrowed grow lights in the living room of my rental house. (My neighbors and landlords definitely thought I was growing something else.) I planted the seedlings and nurtured them all summer long, and they grew into beautifully plump bulbs I was proud of. Had I sold them at a fall farmers market, it would have capped off a successful first season.
Instead, I botched their preparations for storage, leaving them too long in the field during a wet fall and inadequately curing them. My CSA customers received less than half of their onions that year because the bulbs grew mold around their necks and rotted from the top downward in storage.
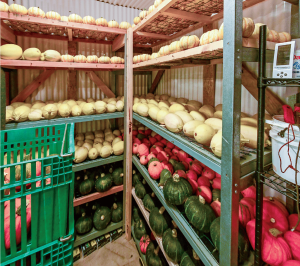
Winter squash almost never cure outdoors at my farm in Fairbanks, Alaska. Instead, I bring them indoors and cure them at 80°F (27°C) and 50 to 60 percent RH for about a week. Photo courtesy of Phil Knapp.
In subsequent years, I learned to harvest onions earlier to allow them more time to dry under fans in the garage. I also became cautious of rainfall on onions after their tops fell, a caution I harbor to this day. (My caution may not be entirely warranted, though, as other farmers leave onions out in intermittent rain without issue after tops have fallen.)
Curing needs can vary widely from year to year and from place to place.
I faced some steep learning curves after moving from Michigan’s Upper Peninsula to interior Alaska, and I needed to adapt my curing techniques to the new climate. My biggest challenge with curing in Alaska has been with winter squash.
In Michigan, winter squash and pumpkins usually grew to full maturity on the vine—corky stems (ahem, peduncles), firm and waxy skins, ground spots, and so on—but in Alaska’s abbreviated season, most winter squash barely eke out maturity before frosts arrive. On top of that, the weather around harvest time in late August and early September is typically cool and wet. In Michigan, I had no issues sun-curing my winter squash, either in the field or on the dry and sunny deck. In Alaska, I have to create those conditions indoors.
Wherever you live and whatever your typical weather patterns are, you should be prepared to cure crops indoors if necessary.
This can be especially tricky if you grow multiple crops that need curing, and those crops cure under different conditions. In practice, you should identify which spaces are conducive to curing and how different crops might overlap their time in those spaces. Extra spaces that can be heated and ventilated as backups will help you deal with timing problems or unusually large harvests.
It’s a helpful coincidence that winter squash and pumpkins and the alliums cure in similar conditions. Many growers use greenhouses to cure these crops since warm and dry environments work for both. Heated shops and sheds can also work for onions, garlic, and squash. Most farmers I know growing sweet potatoes use their storage spaces for the curing period as well, which eliminates extra handling steps between the field and storage. It’s common for potato growers to cure potatoes either in ambient conditions (in other words, without manipulating temperature or humidity) or in their potato storage spaces, similarly to sweet potatoes.
You also need to plan out your curing setups and equipment.
Airflow is key for all curing crops. The constantly flowing air removes and distributes moisture, keeps temperatures even, and prevents buildup of gases like carbon dioxide and ethylene. Keep this in mind when you choose containers or platforms for curing. I once made the mistake of curing winter squash on plywood shelves. With the impervious plywood and inadequate fans, humidity built up underneath my squash and I had problems with rot on their undersides.
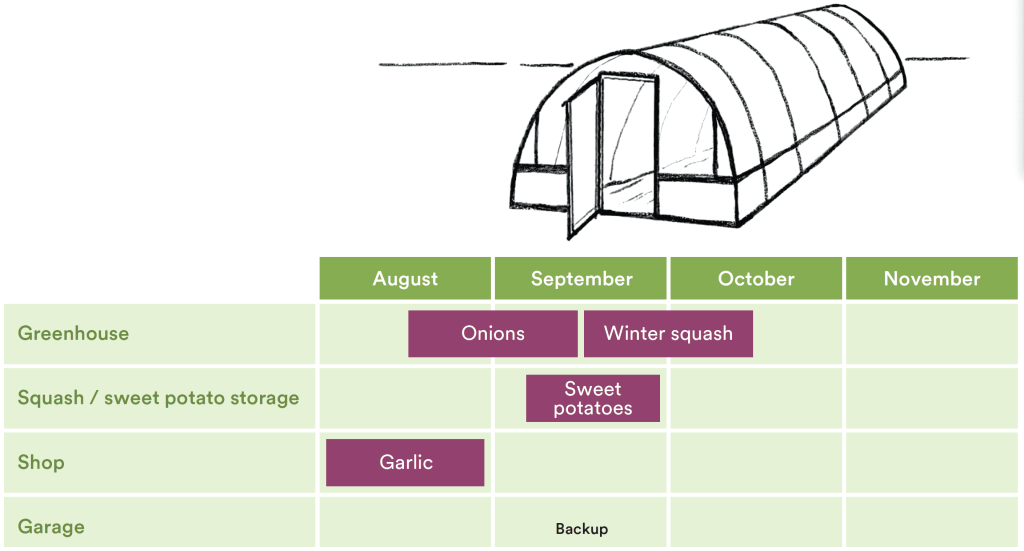
This farm stores its sweet potatoes and winter squash in the same room but, because of their different needs,
doesn’t cure them together. They cure sweet potatoes in the storage room (where it’s easier to maintain steady
temps and humidity), while winter squash join the sweet potatoes after curing in the greenhouse. They also cure
onions in the greenhouse before the winter squash. The farm cures garlic in a shop building and has a garage
available as backup in case of a bumper crop or a problem with one of the other spaces.
Many farms, especially those at small scales, cure alliums and squash in single layers on wire racks or tables to maximize airflow across and under the crops. Some larger farms cure their onions and squash in bulk bins, either singly or in stacks. The trick here is to place fans on top of the bins, lying flat and pointing upward, to pull air up through them; it’s almost always easier to pull rather than push air through something. If the fans over the bins aren’t powerful enough, you can improve airflow in the stacks by wrapping the outsides, creating makeshift chimneys.
Farms that store things like potatoes and onions in bulk piles often use perforated pipes or culverts in the piles for ventilation. Similar to aerating compost, ventilation pipes deliver fresh air to the bottoms of bulk piles to more effectively maintain temperature and control moisture.
How much ventilation is enough?
As a rule of thumb, air should be moving, however subtly, at any place in a pile, stack, or bin of curing veggies. Using your hand, you can try to feel air movement under or through stacks or piles of veggies. If you’re unsure, you can also use smoke or dust to observe subtle air movement.
By observing how the smoke moves—up through the bottom of a stack of bulk bins, for example— you know air is actively moving through your curing crops. If there’s not enough airflow, add more or larger fans.
Recommended Reads
Recent Articles
Think you need a vast outdoor garden in order to enjoy fresh produce? Think again! Cold temperatures doesn’t have to mean the end of fresh greens!
Read MoreStoring seeds is the key to having a successful growing season. Follow these tips for keeping seeds organized so you’re ready to plant as soon as the time is right!
Read MoreThese hardy little berries are great to grow if you live in a colder climate. A versatile evergreen ground cover that bring both ornamental beauty and productive harvests to acidic-soil gardens.
Read MoreGet ready to snuggle up with the softest wool in town! When it comes to rabbits, the Angora is the most commonly used breed for wool. It is exceptionally fine and renowned for its softness, warmth, and fluffiness!
Read MoreReady to start your silvopasture journey? First things first: which animals are right for YOUR land?
Read More

