How to Save Tomato Seeds

As your favorite variety of home grown tomatoes start ripening on the vine this summer, be sure to save those seeds for next year’s planting. It takes a bit of care to get the seeds out of the gelatinous tomato goo they’re suspended in, but once you’ve done it you can use those seeds to cherish and perpetuate the unique flavor of your tomatoes.
The following is an excerpt from The Seed Underground: A Growing Revolution to Save Food by Janisse Ray. It has been adapted for the web.
Photo by Jonathan Billinger, Wikimedia Commons
Pick nice tomatoes that would be perfect for a mean kid to mash up. If they’re large, slice them in half at the equator. Hold them over a canning jar. (Try not to use plastic for anything. Plastic is bad stuff.) Milk the pulp, meaning the gelatinous matrix that suspends the seeds, like frog eggs, into the jar. If you’re working with cherry tomatoes, you’ll have to hold the whole tomato between your fingers and squeeze. The only thing left will be the skin.
Put the jar lid on, give it a shake, and label it with the name of the variety inside. If you don’t label the jar, you will forget what it contains. If you have two tomatoes you’re saving, you think you can sit Yellow Mortgage Lifter on the right and Pruden’s Purple on the left and remember what’s what, and pretty soon you’re wondering if Yellow Mortgage Lifter was on the right or the left. Just do it.
The tomato hull can still be eaten. I think sauce is a good idea at this point.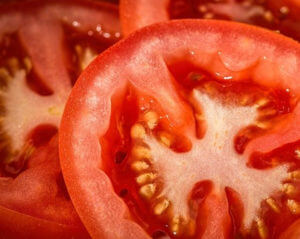
Fermenting, which is what you are doing with the goopy mess in the canning jar, is the best way to save tomato seeds because the process dissolves the gel—which contains chemicals that inhibit germination. Fermentation causes the seeds to germinate more quickly when you plant them the following spring. Fermenting also breaks down the seed coat where seed-borne diseases like bacterial canker, spot, and speck can lurk. Let the mess stand for two or three days in a warm location, longer if the temperature is below 70°F. The books say to stir daily but I don’t.
When a layer of blue-gray mold covers the surface of the tomato-seed funk, the process is complete.
Occasionally in hot weather (seven months a year here), I have had the seeds start to germinate inside the goop, which means that I’ve left them too long untended and they think they’ve actually been planted and it’s time to race off again into plant-building and fruit-making. Don’t be like me.
Look at the underside of the jar. The viable seeds will have sunk to the bottom. Pick off the scum, then fill the jar with warm water and begin to pour off the now-rotten goop, being careful not to pour out your seeds. You may have to add water or rinse seeds off the insides of the jar and pour again, slowly. Viable seeds keep sinking to the bottom. Do this until you have mostly seeds and water in the jar.
Now dump the seeds into a large metal strainer whose holes are smaller than the seeds, rinse, drain for a few minutes, then spread them on a screen or on a plate covered with newsprint or a clean rag (don’t buy paper towels). Leave the seeds until they dry.
Label—very important!—and store.
Recommended Reads
Read The Book

The Seed Underground
A Growing Revolution to Save Food
$24.95
You may like...
-
 $35.00
 -
$39.95
-
$29.95


Recent Articles

Looking to simplify fieldwork on your farm or homestead? The key is to act like a tree: stop working so hard and let nature do some of the work for you.
Read More
Planting certain flowers near gardens can be your go-to solution for keeping pests at bay. Plant these flowers for a pop of color & make pest control seem easy!
Read More
How do you know if you’re picking the right seeds? Here are some easy tips on choosing the best seed crop for your garden.
Read More
When the word mushroom comes to mind, “magic” isn’t far behind. What started this almost immediate association? Explore the history of mushrooms and why so many people tend to be “myophobic”.
Read More
When you plan how you want your garden to look, you’re setting yourself up for success. Here are some tips on how to plan the best garden this growing season!
Read More