
Natural Queen Bee Rearing: Make Way For the Queen!

Queen Bees are essential for a hive. No colony can truly “bee” successful without one. How do you get this almighty queen? It’s all in the honeycomb. Below is a formula for natural queen bee rearing that will help you run a productive hive.
Unless otherwise noted, all photographs copyright © 2023 by Eric and Joy McEwen.
The following is an excerpt from Raising Resilient Bees by Eric and Joy McEwen. It has been adapted for the web.
The Diggin’ Livin’ Formula for Natural Queen Bee Rearing
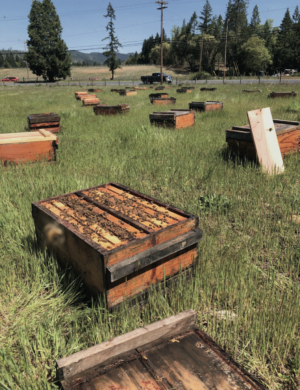
Figure 4.13. We inspect our two-way mating nucleus colonies one month after making them from the resources of large overwintered colonies. Here a colony is found to have reared two new queens. This unit will then have one starter-colony removed and placed into its own hive body with a separate bottom board and lid to facilitate growth into a full-size colony. In the background, a colony found to have only one queen has had its division board removed.
When producing new queens and honey bee colonies, the goal is to appropriate the correct amount of resources to the job in order to produce a vigorous queen. Expenses in the form of honey bees or equipment all contribute to the cost of rearing that new queen, and myriad designs exist in the commercial queen-rearing industry for vessels that optimize the efficiency of rearing a new queen or starting a new colony with the minimum amount of bees and brood necessary to achieve success.
In natural queen rearing, however, the new colony is not just a location for mature pupae to emerge. Importantly, the colony is also responsible for the important job of feeding and tending the queen larvae prior to capping the cell.
Cultivating A Colony
To maximize the success of this process, we must ensure that the starter colony has all the components of a full-sized colony, and each frame we use in our starter colony must be selected with great care. For this reason we feel that our two-way boxes are ideally suited to this process.
By dividing each super, or hive body, into two mating nucleus colonies, we create an optimally sized cavity for the work of queen rearing to be done. This eliminates the need for (and expense of) special mating nucleus boxes. Furthermore, the rearing of a natural queen in-hive is a delicate process that requires a larger critical mass of bees and resources than does a typical mating nucleus, wherein the bees are provided a capped queen cell that was reared in another colony.
In our opinion, a mating nucleus of this standard size is unsatisfactory for raising superior queens. Our boxes hit the sweet spot of resource allocation and critical mass required for the rearing of superior queens.
The Proper Equipment
Using two-way equipment for this specialized task yields two distinct advantages over rearing queens in standard hive bodies. First, we minimize the resources expended to raise each queen. Second, by having two mating nucleus colonies living in a single box (separated by a removable division board), we set the colonies up for a natural transition in the event that one of the mating nucs fails to raise a strong queen.
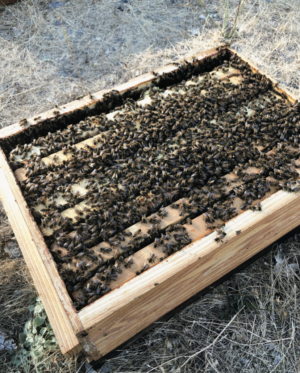
Figure 4.14. This colony has only one successfully reared queen (the most com- mon outcome). Upon confirmation, the division board was removed and the brood frames are rearranged to be adjacent to one another. This facilitates rapid transformation into a single, well-functioning unit. All bees within the box are sisters, and no hostilities were observed.
Statistically, the odds are that one of the mating nucleus hives will succeed in raising a queen, but both may not. When this occurs, we can simply remove the division board and combine the nucleus hives (sister colonies of an original parent colony). In this way we avoid wasting precious resources in the form of bees and brood frames.
Queen Bee Rearing: The Four Combs
When setting up a new nucleus starter colony for natural queen rearing, each colony receives four frames, or combs. These combs are arranged in order from the outer edge of the box toward the middle. If the frames are not placed in a two-way chamber with a middle divider board, it is still important that frames 2 and 3 go in the middle, between frames 1 and 4. If this formula is used in a 5-frame format, the new or empty frame would be placed in position 5, to the outside of frame 4.
Comb 1
The first comb should largely consist of honey and be covered in both adult forager bees and the younger house bees involved in curing honey. A comb of capped honey is good, but a comb heavy with nectar, or with at least partially uncapped honey, is better, as such a comb will contain a wider age range of bees. Ample food reserves are important to ensure the bees remain healthy and vigorous throughout the entire process.
Honey is a good insulator and the bees do not need to incubate it at a high temperature as they do their brood, and so it is appropriate to have it against the hive body wall. Remember, we are trying to replicate the conditions of abundance that characterize a hive preparing to swarm. In those circumstances, there is little room left in the hive for incoming nectar, resulting in a congestion of workers trying to off-load and then store nectar.
Comb 2
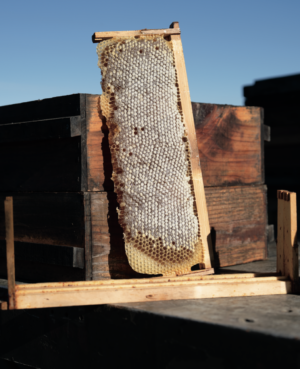
Figure 4.15. An ideal honey frame for making a divide. Photo by Ammon Cluff
This next comb is composed of capped brood. We want capped brood because the tending of new queen larvae takes almost a week (beginning approximately 5 to 6 days before a queen cell is capped), and we want young bees emerging out into the nucleus colony throughout the entire process. Worker brood remains capped for 14 days prior to emerging.
This means that young bees will continue to emerge from this frame until just before the emergence of a queen, ensuring that a good quantity of young bees will be present to feed the queen during her first few weeks of life before she begins to be fed by her own daughters.
Subsequently, this comb will have its cells cleaned out and polished for a week or two before the first eggs are laid by the new queen. This delay typically results in the cells of this comb being backfilled with new pollen stores in anticipation of the rearing of a new brood nest.
Comb 3
We then add one comb of open (uncapped) brood. This comb should include a mixture of eggs and young larvae. The presence of a large number of eggs will ensure that the bees have a wide selection from which to pick their favorites for queen rearing. It is on this comb that the new queen cells will be made. This comb is also in a warmer location due to its proximity to the center of the cavity. The presence of a large number of eggs will increase the likelihood that the comb contains newly laid eggs, which will not hatch for 24 hours or more.
The timing of this is important because queen pheromones dissipate with time, and bees will not initiate queen rearing until these pheromones are below a critical level, typically taking part of a day. Ideally the youngest eggs won’t have hatched until the queen-rearing process is already initiated, which is our goal, given that bees raise better queens when they can select from very young larvae. Searching for young eggs that are standing firmly upright is useful when selecting this comb.
Choosing the Right Comb

Figure 4.16. A well-made-up two-way mating nucleus colony with all the requisite ingredients for two naturally reared queens.
Choosing a quality comb with lots of open, young brood also helps ensure that nurse bees with well-developed hypopharyngeal glands are present on the comb tending to the open brood and producing royal jelly to feed the larvae. These bees are critical for adding the necessary provisions into the queen cell for the healthy development of the queen through pupation. For this reason, it is important that this frame con- tains both the eggs and open brood, as this mixture will result in a nice age distribution, including ample young bees.
The oldest larvae present are the bees that will emerge near the time of the queen’s own emergence, and they will bolster the supply of young bees in the hive that tend to and feed the new queen. This comb will have some worker brood emerging during the first week of the new queen’s life. These cells will then be cleaned out around the time when the queen lays her first eggs. Thus, she can usually be found on this comb when she begins establishing a new brood nest.
Comb 4
The fourth comb, like the first, contains food. This comb should be heavy, with full cells and little room for new stores. However, unlike the first comb it must contain a large quantity of pollen. Pollen is the food supply for young bees who produce the royal jelly used to feed the queen larvae. It is important that they have adequate nutrition to do so.
This comb will have its pollen consumed as the new queen increases her egg laying, and it will become a frame of brood in short order as the new colony develops. Thus, if using two-way equipment, this comb is best on the interior to assist the bees in their desire to incubate this frame at a higher temperature.
All Hail the Queen Bee: Keeping It Crowded
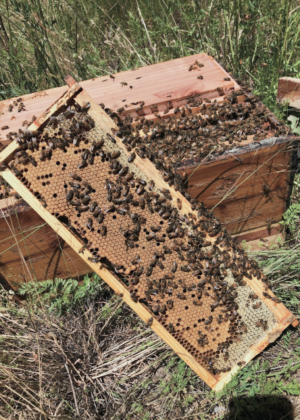
Figure 4.17. On inspection day (31 days after initiating the walk-away split), we hope to find brood at all stages of development—signifying the presence of a healthy, well-mated queen.
Last, and most important, we want the combs in our mating nucleus colonies to be thick with bees. They should be so crowded that we would have a hard time fitting in another bee. If the combs we remove from a parent colony lack adequate bee coverage, then we supplement the population of the nucleus colony by shaking additional frames of open brood upon the others, effectively adding young worker bees. (Be sure to confirm the absence of the queen before shaking a frame of bees into a new starter colony). It is important to not skimp on resources when making up new starter colonies.
It is preferable to make starter colonies in the spring because a new colony requires the full productive season for buildup. This season is, however, one of inclement weather, and the colony will not have a new worker bee pupate and emerge for over 50 days. Ensuring that the new colony has ample food stores, too, will reduce any stresses and allow them to focus upon the most important task at hand—that of rearing a new queen.
Queen Bee Rearing: It’s All In the Honeycomb
We try to use new combs for egg frames to assist the bees in their chore of remodeling worker cells to accommodate queen cell production. We prefer to make divides with newly drawn combs from over the top of the winter brood nest in a western shallow super.
However, this formula is still useful if you are using larger combs, such as deep frames that are 91/4 inches (23 cm) in length or larger Natural Nest frames up to 13 inches (33 cm) in length. In these instances a smaller number of combs containing the required components can be used instead.
By attending to these details carefully, we have success rates comparable with other methods of queen rearing, and we watch while the bees produce high-quality queens that emerge from large, well- developed queen cells. It is a joy to experience.
Recommended Reads
A Home Worth Buzzing About: How to Create the Perfect Bee Hive
Read The Book
Raising Resilient Bees
Heritage Techniques to Mitigate Mites, Preserve Locally Adapted Genetics, and Grow Your Apiary
$17.48
You may like...
-
 $19.98
 -
 $12.47
 -
 $8.97
$8.97
Recent Articles
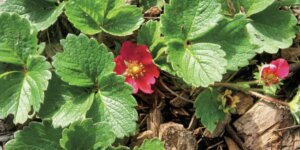
Garden strawberries are excellent for both covering the ground and for growing fruit. If you’re planning out a forest garden, or are just looking for a plant to use as ground cover, strawberries are a great option. The following is an excerpt from The Home-Scale Forest Garden by Dani Baker. It has been adapted for…
Read More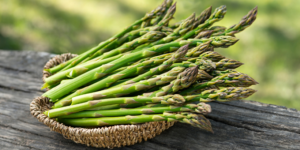
Asparagus is a delicious vegetable with a layered history. How did this aspiring spear make its way from growing in the wild to appearing on our plates? The following is an excerpt from the The Seed Detective by Adam Alexander. It has been adapted for the web. “Nature gives us the key to every secret…
Read More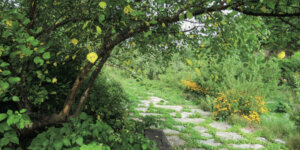
Interested in growing trees? Here are some tips on successfully planting, transplanting, and pruning trees to create a flourishing forest garden! The following is an excerpt from The Home-Scale Forest Garden by Dani Baker. It has been adapted for the web. Planting Potted Trees and Shrubs If you order potted trees, check with your supplier to…
Read More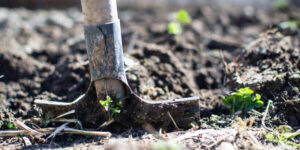
With the right strategies and practices, composting on a small farm is surprisingly easy and inexpensive. Just follow these steps for making compost, and your farm will be thriving in no time! The following excerpt is from The Lean Farm Guide to Growing Vegetables by Ben Hartman. It has been adapted for the web. (All photographs by Ben…
Read More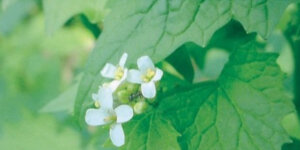
Garlic mustard: while known as “invasive,” this plant can be consumed in its entirety and has great nutritional value. Plus, the garlic-flavor is a perfect addition to any recipe that calls for mustard! The following are excerpts from Beyond the War on Invasive Species by Tao Orion and The Wild Wisdom of Weeds by Katrina…
Read More