
How To Create A Homemade Wreath

From clipping the proper branches to tying the right knots, building a wreath takes patience and precision.
Create this holiday craft with your family to decorate your home, or spread the joy to others by gifting or selling your homemade wreath.
The following is an excerpt from Carving Out a Living on the Land by Emmet Van Driesche. It has been adapted for the web.
Prefer audio?
Listen to the following excerpt from the audiobook of Carving Out a Living on the Land.
Create Your Own Homemade Wreath
You don’t need to have a Christmas tree farm for it to make economic sense to tie and sell wreaths. You can buy greens from an existing Christmas tree farm and still be profitable. Around where I live, a lot of the small-time wreathmakers get permission from landowners to take down overgrown balsam or other conifers from abandoned stands of Christmas trees planted decades ago that never got cut.
If you have a CSA, wreaths can make a nice addition to your share boxes at the end of the year, and an opportunity to get people signed up for the next year. If you have a farm stand, why not keep it open? If you go to markets, any market leading up to Thanksgiving is fair game, and if you mostly wholesale, you can probably find customers for that, too.
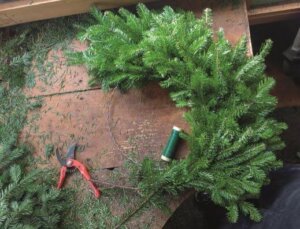
Tying A Wreath
The art of tying wreaths is about controlled chaos. Too perfect, and they look lifeless. Too uneven and they look unsure of themselves, having lost their pleasing symmetry. The trick is to ensure that each bunch of greens that forms the wreath falls within certain parameters for size and length, and once that benchmark is met to avoid making them completely uniform.
Each successive bundle hides the base of the previous one.
I prefer crimped rings, as they are cheap and, unlike smooth rings, keep bunches from sliding around. I also use #24 green coated wire, which is strong enough to keep the wreath together without being overkill and is camouflaged well against the greenery. For my small, medium, and large wreaths, I use 6-, 12-, and 16-inch diameter rings (15, 30, and 40 cm).
Small Change, Big Difference
The rule of thumb is that the finished wreath will extend past the ring by about 6 inches on each side, for a total of a 1½-, 2-, and 2½-foot finished diameter (46, 61, and 76 cm) for the completed wreaths.
While this might not sound like much, even a small change in diameter makes a big difference in how big a wreath looks. Each year, I sell about twice as many mediums as I do smalls and larges. I order all my supplies from Kelco up in Maine, and am always amazed at how swiftly orders arrive in the mail.
Before Tying Your Wreath: What to Do
Before tying wreaths I like to prep a big stack of greens, preferably enough for several wreaths, since one of the biggest wastes of time is picking up and putting down clippers. A word about clippers: I used to try to sharpen my clippers, since a decent pair costs $25, and working with them day in and day out dulls them quickly.
But I could never sharpen them to the same edge that they came with, and I was struggling with tendonitis, so I eventually made the decision to just buy new ones when the old ones became dull. I can buy as many clippers as I want, but I only have one left hand.
Clipping Branches for A Wreath
I prefer medium-sized ARS or Bahco bypass clippers (which are top-quality blades but relatively inexpensive) with simple plastic or metal handles. I don’t have much use for the newer clippers with rotating handles, ergonomic grips, and multiple layers of rubber coatings, which I find to be more difficult to pick up and put down repeatedly and which are overwhelming to use.
I prefer leather sheaths large enough to store them unlocked with their handles open (so that the spring of the handles pressing open against the leather acts as a friction fit) and deep enough that they don’t risk falling out.
How to Cut Branches
Picking each branch up from the pile by the cut end, I start snipping off appropriately sized lengths, working my way methodically down toward my hand. For each size of wreath there is a length range to shoot for: small wreaths, 6–8 inches (15–20 cm); mediums, 8–10 inches (20–25 cm); larges, 10–12 inches (25–30 cm). These lengths translate to different branch junctions.
Your typical balsam branch is perfectly symmetrical, with smaller branches pairing off a central stem. Each of these branches, in turn, is composed of a central stem with even smaller paired branches.
Branch Junctions
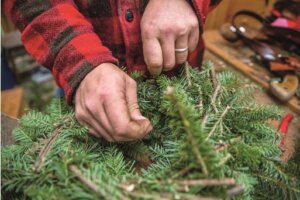
I’ve tied enough wreaths now that I can do it on autopilot. The pace is fast and each motion is precise. Photo by Meghan Hoagland.
These branch junctions are a consistent distance apart where they meet the central stem, making them convenient measures of length for the different sized wreaths. For mediums, for example, I tend to cut at every branch junction, leaving as many pairs together as are evenly matched, to reduce the number of stems I need to handle.
For large wreaths I often leave every other branch junction and for smalls I often cut each branch junction apart. These translate into pieces that are roughly 6, 8, and 12 inches long for small, medium, and large.
Wreath Tying Tips &Tricks
I take care to have the cut portion fall nicely onto the pile on my workbench so that all the branches are oriented faceup with their stems toward me. This makes it easier to pick up the right amount for bundles, since there is no need to flip or shuffle pieces.
If all my pieces fall within the length parameters, all I need to do is pick up six to eight pieces (depending on the number of doubles), bunch them in my right hand, and hold them to the ring while I wrap the wire with my left. I start the wreath by twisting the wire several times around the ring, and then spiral it three times around each bundle, pulling tight each time.
Spiraling the Wire
Different wreathmakers spiral the wire different ways, but I find it easiest to come up through the center of the wreath and wrap down around the outside. I hold the wreath up slightly in my right hand, which also holds each bundle in place, while my left hand pulls each turn tight in a straight-armed downward motion.
If I wrapped the opposite way, I’d be pulling toward myself to tighten, using my biceps, a slightly more fatiguing motion, and a detail that matters if you are doing something all day, every day.
Forming Your Wreath
The wreath is formed as each bundle overlaps two-thirds of the previous bundle, skewed so that one-third of the width is inside the ring and two-thirds is outside. When building each bundle in my hand before wrapping, I make sure the top branches are the best quality I have, as they will be the most visible. Scruffy pieces go all the way in the back to fill out the density while remaining hidden. When I cut the greens, I make sure to cut at branch junctions so that there are no long cut stems sticking up that will be visible in the finished wreath.
The last few bundles that complete the wreath get their stems tucked underneath the branches of the first bundles, and when I can’t fit any more on the ring, I flip the wreath over, snip off the extra stem length of these last few bundles, and tie a quick hanging loop with the wire that also keeps it from unraveling.
Recommended Reads
Read The Book
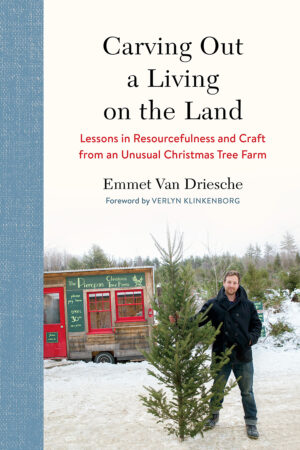
Carving Out a Living on the Land
Lessons in Resourcefulness and Craft from an Unusual Christmas Tree Farm
$7.00
You may like...
-
 $6.25
$6.25 -
 $15.00
 -
 $4.49
$4.49
Recent Articles
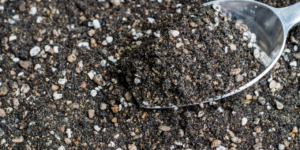
Looking for ways to naturally enrich your garden? The answer is all around you….literally. Add local rocks & soil to your garden to improve soil health and see your crops flourishing in no time. The following is an excerpt from The Regenerative Grower’s Guide to Garden Amendments by Nigel Palmer. It has been adapted for the…
Read More
Garden strawberries are excellent for both covering the ground and for growing fruit. If you’re planning out a forest garden, or are just looking for a plant to use as ground cover, strawberries are a great option. The following is an excerpt from The Home-Scale Forest Garden by Dani Baker. It has been adapted for…
Read More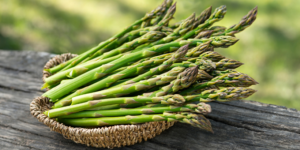
Asparagus is a delicious vegetable with a layered history. How did this aspiring spear make its way from growing in the wild to appearing on our plates? The following is an excerpt from the The Seed Detective by Adam Alexander. It has been adapted for the web. “Nature gives us the key to every secret…
Read More
Interested in growing trees? Here are some tips on successfully planting, transplanting, and pruning trees to create a flourishing forest garden! The following is an excerpt from The Home-Scale Forest Garden by Dani Baker. It has been adapted for the web. Planting Potted Trees and Shrubs If you order potted trees, check with your supplier to…
Read More
With the right strategies and practices, composting on a small farm is surprisingly easy and inexpensive. Just follow these steps for making compost, and your farm will be thriving in no time! The following excerpt is from The Lean Farm Guide to Growing Vegetables by Ben Hartman. It has been adapted for the web. (All photographs by Ben…
Read More