

Mushroom Cultivation Guide: How to Grow Mushrooms on Logs
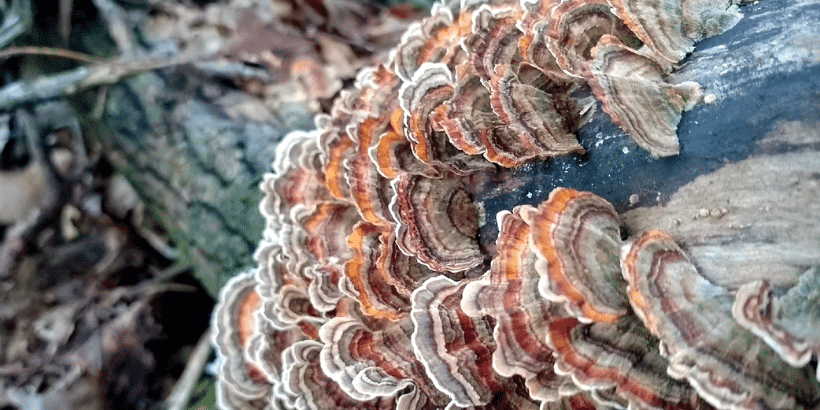
Outdoor cultivation is an easy way to grow mushrooms. All you need is a log, some mushroom starter, and a couple of basic tools. And you will be on your way to producing mushrooms for years to come!
Pro Tip: thoughtful tree selection boosts mushroom production and promotes a healthy forest ecosystem. Read on for how to grow mushrooms on logs!
The following excerpt is from The Mycelial Healer by Christopher Parker and Katherine Parker. It has been adapted for the web.
Growing Mushrooms on Logs
Log cultivation is a way to cultivate many kinds of saprotrophic (wood-eating) mushrooms in areas where suitable species of trees are located and where the climate is satisfactory. What we know of the history of log cultivation begins with the story of Wu San Kwung, a woodcutter in the time of the Sung Dynasty (960–1127 CE) in China, whose careful observations led to the successful cultivation of Shiitake (Lentinula edodes) on logs. The technique of growing Shiitake on logs has evolved since that time, which was more than a millennium ago, but Wu’s discovery was a big gift to the world.

Figure 2.2. Freshly cut and disease-free Tulip Poplar logs.
When to Cut Logs
Understanding the annual cycle of trees and knowing the optimal time to cut wood for the purpose of growing mushrooms is important to your success. Late winter and early spring are the best times for cutting.
The sap is up in the trees at this time and that small amount of sugar content gives the mycelium a bit of a “jump.” Many growers will not accept logs cut any other time of the year, but keep in mind that this is not the only time of the year when you can cut wood for mushroom production.
On our farm in western North Carolina, we have an opportunistic perspective, and so we also use logs cut in late winter through early fall, taking a break in early summer. We stop harvesting logs around the last week in May and wait until the second or third week in June to resume.
We pause because this is when the soil is coming out of its winter slumber and is bursting with energy. Nutrients are rushing up through the xylem in the tree trunks. Leaves are fully out, photosynthesizing and pumping sugars down through the phloem to feed the mycorrhizal fungi in the mycorrhizosphere. As a result, the tree is beginning to grow quickly to take advantage of the season. The rapid growth makes the bark loosen. If you cut trees at this time, the bark will start to fall off the logs within six months or so.
This six-month timeframe is just the point at which the mycelium becomes well established within the wood and becomes strong enough to keep out competitor fungi. Since the timing depends on your location, you will need to talk to locals or do your own research to learn when this time of rapid tree growth occurs for your region. If you make bark baskets, early summer is the perfect time to cut wood and to peel bark.
Everything has a season
Because we are in Zone 6, we stop cutting logs for mushroom production in late fall. We do not inoculate logs after mid- to end of November, and we begin to inoculate again around March 1 according to weather conditions. In some parts of the United States, in Zone 7 and warmer, it is possible to inoculate logs year-round.
Selecting Trees to Cut
When selecting trees to harvest for mushroom production, look for trees that are not diseased or dying. This cannot be stressed enough. It is your first line of defense for keeping competitor fungi at a minimum. Once you have decided on suitable trees to take, keep in mind that you are causing a disturbance in the forest. During tree judging in my high school forestry class, the goal was to determine how suitable the trees would be for lumber and to estimate how many board feet said trees would produce. So, what would we look for?
Nice straight trees, for one thing. Straight trunks would rest more easily on logging trucks, would yield nice straight-grained lumber, and would handle better at the sawmill. But once the straight trees are cut down, what gets left behind? That’s right—all the trees that are not straight. When we cut all but the weakest trees, we are selecting for the weaker genes. So, the gene pool that is left is less suitable for lumber. They are gnarled with undesirable growth patterns. With this approach, there is no true regard for the health of the forest, which in turn means little regard for the health of the animals, for water quality, for air quality, or for us humans.
When consulting with new mushroom enthusiasts, whether they have two acres or one thousand acres, we encourage them to pause and study the forest as a whole, to take into consideration the health of the forest, as they decide which trees to cut. We need to reconsider our tendency to seek instant gratification. Seeing the whole system as a living entity, not a resource, makes a difference in how we interact with the forest. Mushrooms do not care if the trees they grow on are bent or crooked or gnarled, so select those trees for your mushroom production.
Mushroom-Log Inoculation Techniques

Figure 2.3. Fall flush of Shiitakes from a strain we cloned from the wild in Western North Carolina.
There are many ways to inoculate mushroom logs. Whatever method you try, you can be confident that mycelium wants to grow. Given the proper opportunities, they will often outperform our expectations.
Standard Inoculation Method
Once trees are selected and cut, take as much care as possible to keep them off the ground. Imagine cutting a tree and dropping it on top of the leaf litter on the forest floor. If you leave the tree there for several weeks while you gather your materials for inoculation, you may discover that some unknown type of mycelium has grown between the leaf litter and the tree’s bark. And even if you cannot see any rhizomorphic mycelium (thick mycelial threads) growing there, it’s certain that various types of fungal spores are distributed across or in the leaf litter layers, just lying in wait for the opportunity to germinate and get to work.
These forest fungi will compete with whatever mushroom species you plan to grow. This is why keeping your logs elevated off the ground until inoculation is very important. We find that wooden pallets work great for this. Wooden pallets are typically free and abundant. We always use pallets that are not chemically treated.
Pre-Inoculation Log Care: The Resting Period
When I first started plugging mushroom logs in the early 1990s, the common practice was to let the logs rest for six weeks, then inoculate, making sure they were inoculated by the eighth week. It was only a two-week window; we had to work fast. We now know that you can inoculate as early as two weeks into the resting period. That is our rule on the farm: we wait at least two weeks but no more than eight weeks. Even when we have hundreds of logs to plug, this is enough time; we are not burdened by having to hurriedly plug them all at once.
Waiting for the first two weeks to pass is important because there are compounds in tree sap that are allelopathic, or repellant, to saprotrophic fungi, which can make it hard for the mycelium to get established. These compounds will have started to break down after a couple of weeks. By the eight- to ten-week mark, they are mostly dispersed. At this point the logs are open to competitor fungi. In our region of the eastern woodlands, common competitors are Split Gill (Schizophyllum commune), Parchment Fungus (Stereum complicatum), Turkey Tail (Trametes versicolor), and Mazegill (Daedalea quercina). You may deal with a host of other contaminants.
Log Inoculation Procedure
The basic steps in log inoculation are drilling holes in the logs, inserting mycelium in the holes, and applying wax over the holes to seal them. These steps should happen in quick sequence to ensure that the mycelium is exposed to as few possible
contaminants.
The holes drilled in the sapwood are vulnerable openings that spores from the surrounding environment can infiltrate. Use a corded drill (cordless ones tend to run out too quickly) with an appropriately sized drill bit. If you are using plug spawn, you will need a drill bit that matches the diameter of the plugs—most likely that will be 5/16 inch. If you are using sawdust spawn and an inoculation plunger, then use a drill bit that matches the plunger, most likely 7/16 or 1/2 inch.

Figure 2.4. Equipment for standard inoculation using plug spawn.
Equipment Needed
- Logs
- Corded drill
- Drill bits
- Spawn—either sawdust or plug
(wooden dowels) - Inoculation plunger (optional)
- Small slow cooker
- Wax
- Wool daubers or foam paint brushes
1. Set up the logs on a table or other device that will make it easy on your back while you are drilling holes.
2. Drill holes about 1/2 inch deep if using sawdust spawn, and 1 inch deep for plug spawn. There is no benefit to drilling deeper; you just end up using more spawn but will not receive any more mushrooms. The simplest and most common drilling pattern is the diamond pattern. This pattern results in even distribution of inoculation into the sapwood of the logs, which should help ensure uniform establishment of mycelium.
3. Once holes are drilled, fill them quickly with spawn inoculated with the type of mushroom you want to grow. You can pinch some sawdust spawn into each hole with your fingers. If you are inoculating more than a few logs, use an inoculation plunger. If you are using plugs, place the plug in the hole and hammer gently until the plug is flush with the bark.

Figure 2.7. Covering inoculation holes with wax using wool daubers.
4. Seal each hole with melted wax to prevent any insects from getting in and eating the mycelium (figure 2.7). You can use a variety of chemical-free waxes (such as soy) or paraffin-based waxes. Beeswax works, but for us, it’s too precious for this purpose—we save it for making salves. A small, inexpensive slow cooker is a great way to melt the wax. Turn it on high for thirty minutes or so before you begin inoculating logs. We keep wax in the pot at all times—we don’t clean it out between uses. To apply the wax, we use small wool daubers, which we hang from a piece of string over the melted wax. Make sure not to drop them in the wax!
It is easy to set up an assembly-line system to inoculate logs.
Ask people from the community to help, or invite a couple friends to visit. One person drills holes, the next person plugs holes with spawn, and a third covers holes with wax. You can switch jobs as each person grows weary of their post.
Post-Inoculation Log Care: The Incubation Period

Figure 2.8. Logs incubating on pallets in the forest.
With your logs inoculated now comes the first part of playing the waiting game. Try to remember that this is a long game. Those handy pallets where your logs rested will now become the place where your logs will incubate for the next two to three months. The incubation area needs to be as shady as possible and exposed to rainfall.
Make sure you either soak your logs before, or quickly after, they have been inoculated. In the spirit of simplicity, our preferred method is to inoculate logs on a day before rain is predicted, so the rain does the job for us. This also has the advantage of using less water from your home well or municipal water system. Plus, when you water down logs before inoculating, you make those logs much heavier. Personally, after lifting logs for thirty years, I am not interested in making logs heavier.
If possible, set up this incubation staging area close to the logs’ permanent home where they will live out their productive lives. Also consider where the nearest source of water is. During the two- to three-month incubation period, you’ll need to make sure that your pile of logs receives water at least once every two weeks. If you live in a rainy climate, this is taken care of by nature. Otherwise, you’ll need to give them a good soaking every two weeks.
Permanent Location and Fruiting Phase
When the logs have completed the incubation period, the fungi should have enough of a hold to keep contaminants at bay. Where and how these logs should be placed in their permanent location varies according to the species and variety of mushrooms you are cultivating. Pay attention to where these mushrooms appear in the wild: this will help you know where to best place your logs. This will give you clues to what the fungi needs to proliferate in the permanent spot you have set up for them.
For example, if you find Maitake mushrooms growing wild in dry open areas in local forests, then aim to place your Maitake-inoculated (Grifola frondosa) logs in a similar environment. If you are finding wild Golden Reishi (Ganoderma curtisii) on ridges or south-facing slopes, then try to place your Reishi logs in that type of microclimate.
Recommended Reads
Drill, Plug, Wax, Wait: 6 Simple Steps to Growing Mushrooms Outdoors
Read The Book

The Mycelial Healer
A Comprehensive Guide to the Cultivation and Traditional Uses of Medicinal Mushrooms
$34.95
You may like...
-
 $39.95
 -
$42.95
-
$44.95


Recent Articles

Enjoy fresh produce all year long by growing your own food! Achieving a twelve-month growing season is as simple as using the right crop protection structure.
Read More
Beets can be grown year-round and are a perfect, flavorful addition to meals. Get started on growing your own no-till beets with help from these tips!
Read More
All hail the mighty garlic clove! Become a master at garlic growing with these simple tips for growing no-till garlic from seed to harvest.
Read More
Try your hand at preserving veggies by freezing them! Freezing vegetables is a quick, simple way to preserve them for winter meals.
Read More
If you keep your hens in a stationary coop, you’re missing out on their soil building talents. Un-coop that poop by putting your flock in chicken tractors!
Read More