

Strong, Spicy, and Pleasant: Wild Green Kimchi

Need a new twist on kimchi? Look no further than this wild green kimchi from Pascal Baudar.
This is the basic kimchi recipe I use. The ingredients and ratio change all the time depending on the time of the year. During winter months I will use mostly curly dock, dandelion, and watercress; while in Spring I’ll use mostly mustard and radish leaves. Where you live may have ramps and other delicious wild greens. Experiment with what you have, anything from the mustard family will work extremely well.
This recipe should yield a quart of kimchi depending on the wild greens you use. Feel free to add or subtract if necessary so everything fits in your jar. – Pascal Baudar
The following excerpt has been adapted for the web from The New Wildcrafted Cuisine: Exploring the Exotic Gastronomy of Local Terroir.
RECIPE: Basic Wild Kimchi
Ingredients
- 3 cups (750ml by volume) finely shredded wild greens, such as dandelion leaves, black mustard leaves, ramps, watercress, or curly dock (feel free to experiment with your forage)
- 1 1/2 cups (375ml by volume) cabbage ( Brassica oleracea), or variants such as napa, bok choy, or brussels sprouts
- 5-8 garlic cloves
- 1 onion
- 3/4 cup (200ml by volume) chili powder (either mild or insanely hot, if you like it that way)
- 2 cups (475ml by volume) springwater or distilled water
- 1 tablespoon (15g) sea salt (with no additives or anticaking agents)
- 3 large cabbage leaves (large curly dock or mustard leaves would work as well)
Equipment
- Cutting board and knife
- 1-quart or 1-liter canning jar
- Mixing bowl
- Canning funnel (optional)
- Clean stone (used to keep the ingredients under the brine)
- Canning jar lid and band
Procedure
- Clean all the wild food and vegetables you will be using. Cut the cabbage into quarters and trim out the core. Slice each quarter into 1/4 inch(.6cm) ribbons, enough to fill 1 cup (236ml by volume). Slice your wild edibles into thin ribbons as well – you can mix different plants such as dandelion, watercress, and curly dock. You will need around 2 1/2 to 3 cups (600-700ml by volume).
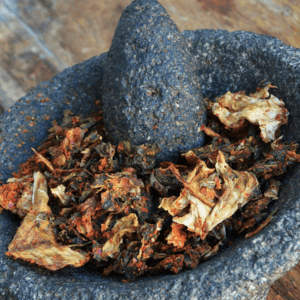
- Using a blender or a molcajete (stone grinder), make a paste with the garlic, onion, and chili powder. I like to use my stone grinder because it gives the paste a rougher texture, but its not terribly important. A nice smooth paste is fine, too.
- Wash your hands, scrubbing them with water and soap for at least 20 seconds. Then mix all the ingredients together with your hands for a couple minutes.
- Pasteurize or clean your jar thoroughly. Pack the jar tightly with the mixed ingredients; the jar should be about three-quarters full, but no more. A canning funnel is helpful for filling the jar, but it’s not a must.
- Prepare a brine with the water and sea salt. Make sure the salt is dissolved. Pour into the jar, leaving 1 to 1 1/2 inches (3-4cm) headspace.
- With clean hands, fold the large cabbage leaves (or other large leaves) to fit the jar’s mouth and push down. The idea is to create a seal so your shredded ingredients stay under the surface of the brine. (This is important to avoid a fermentation going bad.)
- You will need to weigh down all the ingredients to make sure they stay under the brine. I usually use a stone that I have thoroughly cleaned and pasteurized by boiling it for 15 minutes. Some people use other methods, such as a clean drinking glass that fits nicely inside the jar’s mouth, to push the ingredients down. Whatever you use, the idea is to keep everything under the brine. Use a spoon to remove any small floating bits as much as possible. Try to leave around 1/2 inch (1.25cm) headspace and remove any excess brine. I also like to push down the stone a few times and let any air bubbles in the liquid escape. As mush as possible, you want to remove air pockets and make sure that the ingredients are saturated with brine.
- Place the lid and band onto the canning jar, but make sure it isn’t too tight. The idea is to prevent any potential bacteria or flies from getting into your kimchi but at the same time allowing fermentation gases to escape. If you screw the lid down too tight, your jar may explode due to pressure inside and you will end up with a big mess. If you’ve used another type of container, you can place a paper towel with a rubber band over the top, or simply cover with a clean kitchen towel. It’s also a good idea to place the jar onto a plate. During the fermentation process, gas bubbles will form inside your ingredients and the contents may expand a little, causing excess liquid to escape. Once or twice a day I like to remove the lid and push the stone down again (using clean fingers) to let gas bubbles escape. You’ll see that there are a lot of them!
- After 3-4 days, open the lid, smell, and use a spoon to taste the brine. It should be pleasant, spicy, and pungent. If it is to your liking, you can place the jar in the refrigerator, which will slow down the fermentation considerably. I like to eat my kimchi within a week or two.
Recommended Reads
Read The Book

The New Wildcrafted Cuisine
Exploring the Exotic Gastronomy of Local Terroir
$30.00
You may like...
-
 $14.97
 -
 $17.48
 -
 $14.97
Recent Articles
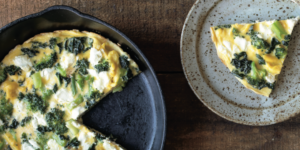
Introducing…your new favorite brunch dish! This whole broccoli frittata is packed with fresh, wildcrafted flavors that are bound to help you start your day off on the right foot. The following is an excerpt from The Forager Chef’s Book of Flora by Alan Bergo. It has been adapted for the web. RECIPE: Whole Broccoli Frittata…
Read More
Wondering where to forage for greens this spring? Look no further than hedges, which serve as natural havens for wild greens and herbs! The following is an excerpt from Hedgelands by Christopher Hart. It has been adapted for the web. Food from Hedges: Salads and Greens Let’s start by looking at all the wild foods…
Read More
There’s a whole new world out there when it comes to koji. It doesn’t matter if you’re making bread, cheese, or ice cream, koji helps you pump up the flavor! Growing Koji in Your Own Kitchen Koji, the microbe behind the delicious, umami flavors of soy sauce, miso, fermented bean sauce, and so many of…
Read More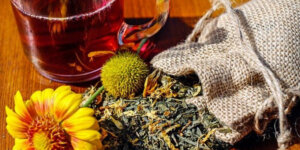
Whether you’re looking to replace your end-of-the-day cocktail, relax before bed, or want something new to add to your tea, this non-alcoholic mocktail syrup base will do the trick. Delicious and all-natural, take a sip of this nightcap mocktail and feel your troubles melt away. The following is an excerpt from Herbal Formularies for Health…
Read More
Want to enjoy bread without worrying about gluten? With Einkorn bread, a light bread with the lowest glycemic index, you can still enjoy all of the delights of bread. without any of the allergic reactions! The following is an excerpt from Restoring Heritage Grains by Eli Rogosa. It has been adapted for the web. Einkorn…
Read More