

9 Things to Consider When Building Your Own Greenhouse

Daydreaming of extending your growing season and building your own greenhouse? After considering the following factors and making a few additional preparations, you’ll be all set to grow food for you and your family in your backyard greenhouse for years to come.
The following is an excerpt from The Forest Garden Greenhouse by Jerome Osentowski. It has been adapted for the web.
What to Consider Before Building Your Own Greenhouse
1. Foundation: Freestanding or Attached?
A freestanding greenhouse can be a great opportunity to create a completely new space with few restrictions. My Phoenix greenhouse at CRMPI is certainly a terrific example of using design flexibility to truly pick and choose details from the ground up, offering perhaps greater potential for high-end performance.
However, the costs inherent in building a heavily insulated north wall can be significant, and it doesn’t make much sense to build a small freestanding greenhouse for this reason; they tend to be overbuilt and inefficient unless of adequate size. I recommend minimum dimensions of 12 × 30 feet. Also, without an attached structure, it is more likely to need backup heat, depending on the climate zone step you want to achieve.
Attached greenhouses offer an oasis right off of your home, an extra living space through the winter, shared heating, and reduced construction costs because of a preexisting north wall. They can be any size, and they don’t necessitate the extra paths and infrastructure that a separate structure would.
At the same time an attached greenhouse will almost certainly obstruct the view to the outside and without a screen door can introduce insects to your home. They carry some risk of unwanted humidity without a sliding glass door and proper ventilation. Also, your design will be bounded by the preexisting conditions of the house that you want to retrofit.
2. Orientation

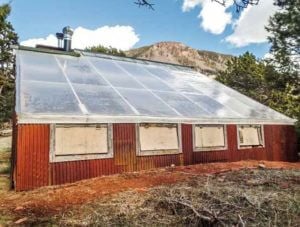
South-facing glazing of Mana, with Shree seen attached to the west side of Mana and volunteer sunflowers in the bed to the south of Shree. The soil in the beds is retained by urbanite (repurposed broken concrete). The roof of the house has 6.3 kilowatt photovoltaic solar panels (PVs) installed, providing all the energy for the entire institute.
In North America the optimal orientation for a greenhouse is usually directly south or southeast, because in cold climates it’s important to capture the early morning sun. An east-facing orientation can work as well, especially if there is some glazing with a southern exposure. In most situations western orientation or exposure should be avoided because of the potential to overheat.
These recommendations, by the way, should be understood to be guidelines, not hard and fast rules; it’s important to examine your situation carefully.
In regions where it’s cloudy for most of the winter, such as the Northwest, orientation is less important because the cloud cover diffuses sunlight over the entire sky. Also, at higher latitudes, the summer sun moves much farther north.
3. Length-Width Proportions
A greenhouse that is shorter than it is wide doesn’t have as long a window for solar gain during the day. At CRMPI, my Mana greenhouse is 24 × 35 feet and tends not to work as well as the 76 × 26 foot dimensions of Phoenix. This difference is because the sun has a lot more time in the day to heat up a space with a long east-west axis. It’s an especially important consideration if you’re building a freestanding greenhouse. A good rule of thumb is a 3:1 size ratio.
4. Foundation
There are many different materials and methods for building foundations, and you can use any that apply to building other structures to a greenhouse. At CRMPI the most recent foundations I’ve used have been concrete piers (see image below) tied together with the framing of the structure. Two earlier greenhouses here used sunken pressure-treated wooden posts for foundation footers.
It’s easy to overbuild greenhouse foundations because they are only holding up glazing and occasional snow loads, but depending on engineering regulations in your area and your approach to permitting, your options may be limited. Liability concerns can also be a factor in a school or business setting.
 5. Roof Slope
Though Phoenix’s roof has a slope of 4/12 (falling 4 inches for every foot of length), at EcoSystems Design we typically plan for a 6/12 slope to shed heavy snow loads, depending on the climate of the region.
Because the greenhouse is warmer than the outside air, a layer of snowmelt often forms between polycarbonate glazing and snow, helping the roof to shed any snow of significant weight. Snow tends to stick more to double-inflated poly.
Related to the roof slope is the freeboard, the space between the lowest point of the roof and the ground. In areas with heavy snow, at least 3 or 4 feet is good to have so that snow won’t pile back up onto the greenhouse roof or obstruct any vents.
6. Framing and Glazing Materials
The two most common framing materials are wood and metal. Wood is excellent for smaller greenhouses and has the advantage of being a cheaper, familiar material that is easier to work, with or without specialized tools. Salvaged, rough-sawn, or beetle-kill lumber is readily available.
Wood requires greater upkeep; although depending on the type of lumber, it can easily last fifty years in a dry climate with the proper paint and maintenance.
Nearly all commercial greenhouses today are made with galvanized steel, often designed to be connected in a long series.
Kit greenhouses are most often made of steel, and the included fasteners and instructions can make assembly quite easy.
Galvanized steel has a much longer life span than wood and doesn’t require staining, sealing, or much maintenance. As shown by the roof slope of Phoenix, steel framing often offers less flexibility in construction, especially when salvaged from other projects.
Glazing options are constantly evolving. Six-mm double- inflated poly will be cheaper, more flexible, and less insulating, while more expensive, rigid polycarbonate panels tend to last longer and hold up better against snow. Double-inflated poly was an excellent cheaper option in the early years at CRMPI, and it continues to function well on the roof of several of our greenhouses.
Glass can be appropriate for eastern or southern walls, but it should be used only for vertical glazing because of its considerable weight. Mounting problems can occur because of expansion and contraction, and glass presents a much bigger problem than polycarbonate or plastic if it breaks. It is typically more expensive and less insulating than polycarbonate and will also tend to intensify direct sunlight, which can even burn plants in some cases.
7. Insulation
Insulation is essential on the north wall and the west wall; make sure to insulate all the walls you do not have glazing on. Foam insulation or structural insulated panels (SIPs) work well but need to be sealed and kept dry—they aren’t rated for the humidity in a greenhouse.
I used these panels when constructing Phoenix, but commercially we’ve started to use metal siding directly against the Styrofoam on the inside of the SIP to eliminate any wood product. There’s a lot of room to implement your own preferred method here.
Straw bales are a popular natural building method but probably not a good idea for use in a greenhouse because of the potential for mold problems in a high-humidity environment.
8. Beds and Paths
People often want to install large paths to accommodate carts and wheelbarrows, but think carefully about the way you’re going to be using your greenhouse.
After the initial construction and bed preparation, there isn’t much need to bring large amounts of material in and out. Here at CRMPI I tend to build smaller pathways to maximize growing space, and I keep a large staging area near the door to bring mulch and materials in with fifteen-gallon nursery pots.
9. Microclimates
Each greenhouse creates a new macroclimate inside it, but within that can be a variety of microclimates. These will be produced by your design and the materials used and may change over time with the addition of thermal mass by water tanks, more plant biomass, or new infrastructure.
While the greenhouse climate will be mostly homogenous, it’s important to identify existing microclimates to help in establishing thriving plant communities.
For instance, cold air sinks, so if your greenhouse has two levels or slopes, the lowest path will be a cold sink, and the outer edges of the space will be colder in the winter where they lose heat to the outside. By installing circulating fans, you can help mitigate this problem.
The southwest corner will usually be the sunniest and hottest quadrant of the greenhouse because it receives the most sun exposure. The northeast will be cooler and is a good place for a propagation table or washing station. Be aware of the way plant growth will create shady zones over time, and plan for your tallest perennials in the northwest, often the tallest point of the greenhouse.
Recommended Reads
Read The Book
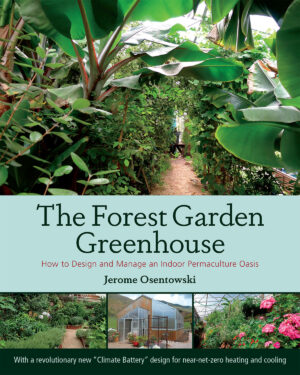
The Forest Garden Greenhouse
How to Design and Manage an Indoor Permaculture Oasis
$17.48
You may like...
-
 $17.48
 -
 $22.48
 -
 $14.97
Recent Articles
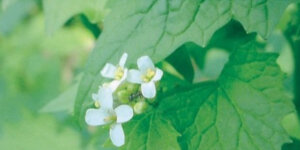
Garlic mustard: while known as “invasive,” this plant can be consumed in its entirety and has great nutritional value. Plus, the garlic-flavor is a perfect addition to any recipe that calls for mustard! The following are excerpts from Beyond the War on Invasive Species by Tao Orion and The Wild Wisdom of Weeds by Katrina…
Read More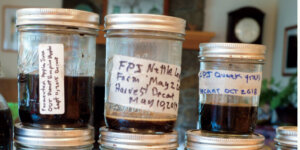
Everyone loves a refreshing, fermented, nutritious drink…even your garden! Take your fermentation skills out of the kitchen and into the garden by brewing fermented plant juice. The following is an excerpt from The Regenerative Grower’s Guide to Garden Amendments by Nigel Palmer. It has been adapted for the web. How to Make Fermented Plant Juice Fermented…
Read More
Want to see your crops thrive this upcoming growing season? The key is in soil fertility and health. Spend time maintaining your soil’s health to guarantee bigger and better crops come harvest time! The following is an excerpt from No-Till Intensive Vegetable Culture by Bryan O’Hara. It has been adapted for the web. What Is Soil Fertility?…
Read More
Many know the effects of catnip on our feline friends, but few realize that catnip has medicinal effects for humans. From stomach aches to reducing fevers, catnip is a versatile herb with many benefits. The next time you grow this plant for your cat you may end up taking a few cuttings for yourself! The…
Read More
It’s time to take control of your seeds and become a plant breeder! Saving your seed allows you to grow and best traditional & regional varieties, and develop more of your own. The following excerpt is from Breed Your Own Vegetable Varieties by Carol Deppe. It has been adapted for the web. Becoming A Plant…
Read More