

The Ultimate Guide to Sheet Mulching

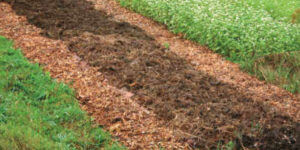
Sheet mulching is a layered mulch system that nurtures the soil. You start with a biodegradable weed barrier like cardboard. From there, you build a thick, layered substrate for your garden with compost and mulch. As the materials break down, worms move in, softening the soil below, and creating a healthy, aerated planting bed where there was once dead and compacted clay.
The following excerpt is from Gaia’s Garden, Second Edition: A Guide to Home-Scale Permaculture by Toby Hemenway. It has been adapted for the web.
The Ultimate, Bombproof Sheet Mulch
Sheet mulching can be as simple as putting down layers of newspapers topped by eight to twelve inches of nearly any mulch material. But if you want to build the perfect sheet mulch, here’s how.
If this is your first sheet mulch, start small. Sheet mulch gobbles up a tremendous amount of organic matter—the roughly two cubic yards held by a full-sized pickup truck will cover about fifty square feet. But don’t scrimp. It’s much better to blanket a small area thoroughly than to spread the mulch too thin to smother weeds or feed the soil properly. Choose a site that’s not more than 200 square feet, in the proper location for the intended plants, and preferably near the house. Remember your zones: Deeply mulched beds will soon be covered with a riot of plant life, and you want these awesomely productive areas right outside your door, to easily tend or to admire the many avian and insect visitors.
What You’ll Need:
- A two- to three-foot stack of newspaper, minus any glossy sections, whose inks may contain metal pigments (the black and colored inks on standard newsprint are soy-based and nontoxic), or about 300 square feet of corrugated box cardboard without staples or plastic tape. You can also use cloth, old clothing, or wool carpet, provided they contain no synthetic fabric, but these take far longer to decay than paper.
- Soil amendments, depending on your soil’s needs: lime, rock phosphate, bonemeal, rock dust, kelp meal, blood meal, and so on.
- Bulk organic matter: straw, spoiled hay, yard waste, leaves, seaweed, finely ground bark, stable sweepings, wood shavings, or any mixture of these, ideally resulting in an overall C:N ratio between 100:1 and 30:1. Grass clippings are also good, but only when mixed with other “brown” mulches—otherwise their high nitrogen content causes anaerobic—and hence smelly, slimy—decomposition. You will need about four to eight cubic yards of loosely piled mulch for 100 to 200 square feet, or six to ten two-string bales of hay or straw.
- Compost, about a quarter to half a cubic yard (six to twelve cubic feet).
- Manure: a quarter to one cubic yard, depending on the concentration and amount of bedding mixed in. About six cubic feet of composted steer manure or other bagged product will be plenty.
- A top layer of seed-free material, such as straw, leaves, wood shavings, bark, sawdust, pine needles, grain hulls, nut husks, or seagrass. You will need roughly one cubic yard or two to four two-string bales.
If you can’t find every item, don’t worry. Sheet mulching is very forgiving. As long as you have enough newspaper or cardboard, plus organic matter of almost any kind, you’ll end up with great soil. Store your supplies near the chosen site so you won’t have to move them too far on sheet-mulch day. Keep them dry, too.
What To Do:
 The day before you mulch, water the site well unless the ground is already moist from rain. The organisms that will be turning your mulch into rich earth can’t work without water, and, once the mulch is in place, it takes a lot of water to moisten the bottom layers. Conversely, it takes a long time for the layers to dry out—you’ve got lots of water storage.
After the water has soaked in overnight, slash down any vegetation. Don’t pull up weeds—leave all the native organic matter right there, including the roots. Just clip, mow, scythe, or weed-whack everything down in place. It’s great worm food, and the nitrogen-rich greens and roots will be a tasty starter for the decomposers. Remove any stumps or big woody pieces.
Next, add any soil amendments. If your soil is acid, sprinkle on some lime. For alkaline soil, a little gypsum or sulfur will help. A dusting of rock phosphate or bonemeal will supply phosphorus. Greensand, kelp meal, or rock dust will add trace minerals. Use a soil test or your own understanding of your soil’s fertility to guide the type and quantity of soil amendments.
If your native earth is clayey or compacted, now is a good time to open it up a bit. Just push a spading fork into the ground, rock it a little, and pull it out. Do this across the entire mulch site. Don’t turn the earth, just poke some holes into it and crack it open to allow better moisture and root penetration and soil-critter movement.
Then add a thin layer of high-nitrogen material. This can be manure, blood or cottonseed meal, fresh grass clippings or other lush greens, or cast-off produce from restaurants or markets. For concentrated matter such as rabbit manure or blood meal, sprinkle down enough material to just cover the soil. Grass clippings or bedding-rich manure should go down about an inch thick. While this layer isn’t essential, it attracts worms and burrowing beetles, which will aerate and loosen the soil.
 Now the fun begins: putting the sheet in sheet mulch. Lay down newspapers and/or cardboard to create a continuous light-blocking layer that will smother existing plants. Cardboard is very satisfying to use since those big sheets, especially boxes from appliances and bicycles, cover the ground fast. Overlap the sheets by six inches or so to keep weeds from sneaking between them. Newspaper should be laid down one-eighth to one-half inch thick.
As you spread out the sheets, wet them thoroughly. Do this frequently if a breeze comes up—watching your sheet mulch flap away is pretty demoralizing. Soak the sheets several times to make sure the water seeps through. If you’re sheet mulching with a group, this is when hose-fights usually erupt, tugging any well-orchestrated work-party toward mayhem.
Try not to walk on the paper, especially after it’s wet, as this pulls the sheets apart and creates gaps. Pretend you’re painting a floor: Start at the far side and work toward the access or materials pile so you won’t walk on your work.
Next, toss down another thin layer of nitrogen-rich manure, meal, or fresh green clippings. This will entice the worms up through the soon-to-be rotting sheets and coax plant roots downward.
On top of this, pour on the bulk mulch, about eight to twelve inches of loose straw, hay, or other substances listed above. Weed seeds in this layer aren’t a big concern, as a thick, seed-free stratum will lie atop this one. Weed seeds seem to rot rather than germinate in the slowly composting mass.
Bales of hay or straw don’t have to be fluffed up to their original grassy bulk. Just break the bales into thin “flakes” about one to two inches thick and lay down about three thicknesses of these. Broken into several layers and moistened, the dense flakes will expand and compost perfectly well.
To create an easily compostable sheet mulch, pay attention to the carbon:nitrogen ratio in the bulk mulch layer. If you’re using high-carbon materials such as straw or, especially, wood shavings, sprinkle on nitrogen in the form of blood meal or other nitrogen-rich source, or “dilute” the carbonaceous mulch with perhaps one part clover hay, seaweed, grass clippings, or other high-nitrogen mulch for every four of high-carbon matter (see Table 4-1 for a list of mulch materials and their C:N ratios). A mulch that is extremely low in nitrogen, such as wood shavings, will be slow to rot down and may cause anemic plant growth. You don’t need a perfect C:N balance—just make sure there’s some nitrogen in the mix to feed the compost critters.
As you build this layer, spray on water every few inches. This layer should be damp but not wet; you’re looking for that wrung-out sponge state. This can require a surprisingly large volume of water. It may take a couple of minutes of soaking every few inches to achieve the damp-but-not-wet state.
Atop the bulk mulch, add an inch or two of compost. If this is in short supply, add compost plus whatever soil is on hand to reach the final thickness. Or, if the pile will have a few months to compost before planting, you can substitute manure or several inches of easily compostable material for this layer. But if you plan to plant the sheet mulch within a few weeks, a layer of compost will be necessary to act as a seedbed.
The final layer is two inches of weed- and seed-free organic matter, such as straw, fine bark, wood shavings, or any of the others listed above. Besides smothering weeds, this layer gives the project, in landscaper jargon, “that finished look,” which will endear you to your more fastidious neighbors. For planting seeds and starts, push this layer aside to reach the compost/soil layer right below, just as you would with any mulch.
Recommended Reads
Turn Barren Soil into Black Gold: 9 Simple Steps to Sheet Mulching
Read The Book
Gaia's Garden
A Guide to Home-Scale Permaculture, 2nd Edition
$14.97
You may like...
-
 $14.97
 -
 $12.47
 -
 $17.50
Recent Articles
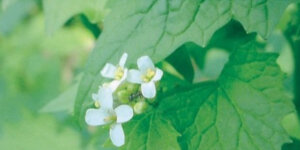
Garlic mustard: while known as “invasive,” this plant can be consumed in its entirety and has great nutritional value. Plus, the garlic-flavor is a perfect addition to any recipe that calls for mustard! The following are excerpts from Beyond the War on Invasive Species by Tao Orion and The Wild Wisdom of Weeds by Katrina…
Read More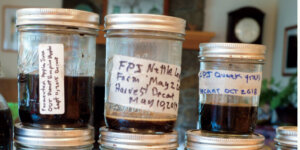
Everyone loves a refreshing, fermented, nutritious drink…even your garden! Take your fermentation skills out of the kitchen and into the garden by brewing fermented plant juice. The following is an excerpt from The Regenerative Grower’s Guide to Garden Amendments by Nigel Palmer. It has been adapted for the web. How to Make Fermented Plant Juice Fermented…
Read More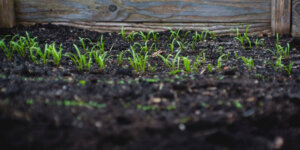
Want to see your crops thrive this upcoming growing season? The key is in soil fertility and health. Spend time maintaining your soil’s health to guarantee bigger and better crops come harvest time! The following is an excerpt from No-Till Intensive Vegetable Culture by Bryan O’Hara. It has been adapted for the web. What Is Soil Fertility?…
Read More
Many know the effects of catnip on our feline friends, but few realize that catnip has medicinal effects for humans. From stomach aches to reducing fevers, catnip is a versatile herb with many benefits. The next time you grow this plant for your cat you may end up taking a few cuttings for yourself! The…
Read More
It’s time to take control of your seeds and become a plant breeder! Saving your seed allows you to grow and best traditional & regional varieties, and develop more of your own. The following excerpt is from Breed Your Own Vegetable Varieties by Carol Deppe. It has been adapted for the web. Becoming A Plant…
Read More