

3 Steps to Start Your Plants Off Right

How you handle your seeds and your practices around seeding is your first chance to get your plants off to a good start and help them achieve their full potential. Ben and Penny Hewitt, authors of The Nourishing Homestead, have developed a three-step process which starts with inoculating the seeds, then sowing them in high-quality potting soil, and finally using soil blocks instead of pots to start seedlings.
It may not be quite as easy as 1-2-3, but the increased vigor and yield the Hewitts have experienced with their crops using this system has made it worth the extra effort. Check out the following excerpt from The Nourishing Homestead for more details on how you can incorporate these three steps into your planting routine.
Seeding
Perhaps the best way to think of your seed and your practices around seeding and starting your plants is to draw the obvious analogy to human gestation. Starving your seeds of nutrients is no different from starving your unborn child of nutrients, and the results will be no better in the long haul. This is the first opportunity we have to minimize the stresses that negatively impact your crops’ potential.
Step 1: Inoculate
You may be familiar with inoculating legumes, which is the process of coating the seed with the bacteria that allow it to “fix” nitrogen in the soil. But it’s not merely legumes that benefit from inoculation. In fact, prior to sowing, we treat all of our seed with a high-quality inoculant (you can get some from Advancing Eco Agriculture with their BioCoat Gold™).
Seed inoculant is cheap as all get-out: For a mere 13 bucks, you can purchase enough inoculant to treat 100 pounds of seed, and the process is ridiculously simple. Just mix a pinch of the powdered inoculant with the seed inside the seed packet. Doing so assists with germination, improves seed vigor, and breaks down nutrients so they are available to young roots. In other words, it’s a jump start on plant health.
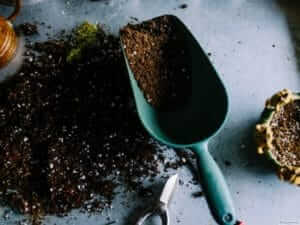
Step 2: Sow Your Seeds into High-Quality, Inoculated, and Mineralized Potting Soil
Ideally, we’d be making our potting soil from scratch, but until we realize that goal, we purchase high-quality potting soil from the Vermont Compost Company. Their Fort Vee potting soil includes compost, sphagnum, rock phosphate, gypsum, protein meal, kelp, bone char, crushed granite, and vermiculite. We add more kelp, montmorillonite clay, humates, and alfalfa meal, which can generally be found at your local farm supply store. We also add two ingredients that will likely require a bit more diligent shopping: a biological inoculant (we use Biogenesis from NDSC) and an enzyme microbial stimulant (Pepzyme from NDSC).
The quantities of our additions are not an exact science. Roughly speaking, to a 60-quart bag of potting soil we add a quart each of the first five ingredients, a few grams of inoculant, and half a milliliter of Pepzyme mixed into the water we use to moisten the soil.
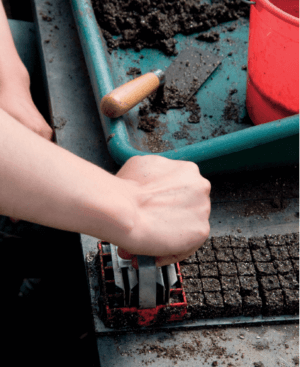
Step 3: Punt the Pots
 One of the best investments we’ve made in the health and vitality of our seedlings, and therefore of the vegetables we ultimately grow and eat, is a soil blocker. This is a small mechanical contraption that compresses loose potting soil into tight seedling blocks that are then released into an open flat. They are available in numerous sizes; we use one that makes twenty 3⁄4-inch blocks for starting peppers, tomatoes, and eggplant. Because we have limited space for our starts, the mini blocks make it possible to germinate lots of seedlings in a small space. The most vigorous seedlings are then transferred to a larger block shortly after germinating.
The size blocker we use most makes four 2-inch blocks. We own two of these blockers, one with a seed pin that makes seed-sized holes in the top of each block and one with a 3⁄4-inch cube pin that creates a hole in the top of the block that’s just the size of the mini blocks. Coincidence? I think not.
The blocker with the seed pin is used for brassicas, lettuce, chard, celery, celeriac, onions (four seeds to a block), basil, parsley, and other herbs and flowers. We also use it for germinating squash, cucumbers, and melons. The 2-inch blocker with the cube pin is, of course, for anything that has been sown into mini blocks, as well as for larger seeds like corn or beans.
Lastly, we have a blocker that forms a single 4-inch block with a 2-inch square relief in the top to accept the 2-inch blocks. We use this for “potting on” (a term that means potting up in size) cukes, winter and summer squashes, peppers, and eggplant.
The two smaller sizes of soil blocks are quick to make after a little practice. It’s key to get the soil moisture just right; generally, we make it a bit wetter than for pots. Think spongy, not soggy; you should be able to squeeze a few drops out of a handful.
The larger 4-inch blocks are more time consuming to make, simply because they tend to fall apart without a studious effort to really pack the soil into the form. For this reason, we are not above using large pots instead if time is short. We always use 6-inch pots for potting on tomatoes, because with the 4-inch blocks, it isn’t possible to set the original 2-inch block deeply enough in the soil to take advantage of all the little root hairs on the stem that will create a stronger root system if buried in the soil.
The advantages of soil blockers are numerous.
First, they eliminate the inevitable waste and expense of cracked and broken containers that must be discarded and replaced. Second, the blocks are cubic, rather than tapered, providing more room for root growth. Third, by eliminating the impenetrable walls of a plastic container, you eliminate one of the primary limiting factors to early plant growth and vitality.
To understand why this is true, remember that the growth you see above the soil surface is merely a reflection of the growth that is happening below the surface. In fact, root growth generally exceeds top growth, which means that a 4-inch seedling in a 4-inch pot is already experiencing diminished potential as its roots bump against the hard container surface. Think of a plant’s roots as its “feelers”; as soon as these feelers hit the container wall, they circle around, looking for more space, and in that circling back, a degree of vitality and development is lost. Before you’ve even put your starts in the ground, you’re losing vigor and yield.
In blocks, instead of the roots circling, they simply fill the block to the edges and wait. When transplanting, there is no root shock and seedlings are quickly established in their new environment. However, if the seedlings are not transplanted in a timely manner, they will eventually grow into neighboring blocks, which should be avoided.
Once the seeds have been inoculated as discussed, Penny then engages in a bit of seed discrimination, selecting the largest, plumpest seeds from each packet for planting. She also plants more seeds than necessary, so that she can discriminate once again when the seeds become seedlings by discarding the ones that lack the vigor of their companions. In the case of tomatoes and peppers, she’ll actually plant at least twice as many seeds as the actual number of seedlings she’s looking for, just so she can have the pick of the litter. If this seems wasteful, I assure you it is precisely the opposite, because by selecting for health and vitality, we end up with far greater yield for a given square footage of garden space.
Our earliest seedlings are started on shelves in front of a set of south-facing French doors. We have chosen to not rely on artificial lighting or heat for our starts, a habit established during the 15 years we were disconnected from the utility grid and simply didn’t have access to the necessary electricity. Now that we are grid-connected, we could rely on these technologies, but we still choose not to, because our cheap electricity inevitably costs someone, somewhere a great deal.
Once the weather warms up, we transfer our flats of seedlings to makeshift shelves on the enclosed porch that houses our summer kitchen. We installed translucent panels on the southern end of the porch expressly for this reason, and the seedlings thrive out there, as long as we bring them inside for the nights, until temperatures warm up. This daily shuffling of our seedlings—out to the porch in the mornings to catch the most light, in from the porch in the evenings to protect them from the cold—is unquestionably a hassle, necessitating reminder notes left in conspicuous places (BRING! SEEDLINGS! IN!). But like most hassles, it seems bigger than it actually is. As the season progresses, there are more and more flats to move, but with the boys’ help, it generally doesn’t take much longer than seven or eight minutes. Just about the time we’re getting sick of this little dance and the number of flats has increased to multiple dozens, it is suddenly warm enough to leave them out at night.
Seeds that need a lot of heat to germinate, such as tomatoes, peppers, and eggplant, are granted a coveted spot atop our coldbox, which resides near the wood cookstove. As soon as they germinate, they are potted on into the larger-sized soil blocks and placed in front of the French doors with their companions.
The next big stressor event for our seedlings is transplanting. We’ve already mitigated some transplant shock by seeding into soil blocks, rather than containers. We also refrain from starting our seeds too soon. This is not easy, because like most gardeners, by the time March rolls around, we’re chomping at the bit. But we have found that vigorous seedlings of the proper age do better than seedlings that were started too early and have grown beyond the capacity of their soil blocks to fully nurture them. Finally, all our seedlings are allowed a few days in their flats outside to “harden off” in preparation for transplanting. We then transplant on an overcast day or late in the day, to protect the young seedlings from the stress of direct sun.
Over the years, as we’ve learned to select for more vigorous seed and seedlings, we’ve also learned that we have to take this increased vigor into account and provide them with a little extra space to fully express themselves. Whereas we once planted our tomato plants 1 foot apart, we now allow them at least 2 feet, if not even more. This may sound counterintuitive; after all, if we’re planting fewer plants, won’t our yield be greatly reduced? But the reality is precisely the opposite. In fact, over the past few years, our tomato yield has increased dramatically, despite a 50 percent reduction in actual plants. The genetics are the same. The overall space devoted to their cultivation is the same. The only thing that’s different is that we’ve created an environment that allows our plants to come closer to achieving their full potential.
You may like...
-
 $14.97
 -
 $9.97
$9.97 -
 $9.97
$9.97
Recent Articles
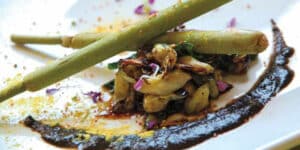
Chances are, you’ve seen cattails growing on the edge of your local lake or stream at least once or twice. Instead of just passing these plants, try foraging for and cooking them to create delicious seasonal dishes! The following excerpt is from The New Wildcrafted Cuisine by Pascal Baudar. It has been adapted for the…
Read More
With the right strategies and practices, composting on a small farm is surprisingly easy and inexpensive. Just follow these steps for making compost, and your farm will be thriving in no time! The following excerpt is from The Lean Farm Guide to Growing Vegetables by Ben Hartman. It has been adapted for the web. (All photographs by Ben…
Read More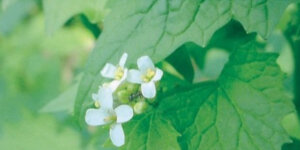
Garlic mustard: while known as “invasive,” this plant can be consumed in its entirety and has great nutritional value. Plus, the garlic-flavor is a perfect addition to any recipe that calls for mustard! The following are excerpts from Beyond the War on Invasive Species by Tao Orion and The Wild Wisdom of Weeds by Katrina…
Read More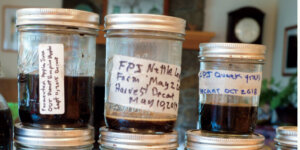
Everyone loves a refreshing, fermented, nutritious drink…even your garden! Take your fermentation skills out of the kitchen and into the garden by brewing fermented plant juice. The following is an excerpt from The Regenerative Grower’s Guide to Garden Amendments by Nigel Palmer. It has been adapted for the web. How to Make Fermented Plant Juice Fermented…
Read More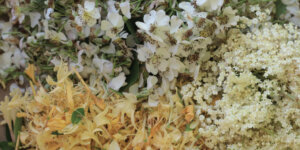
Oh, honeysuckle…how we love thee. If only there was a way to capture the sweet essence of this plant so we could enjoy it more than just in passing. Luckily, foraging and some preparation can help make that happen! Here’s a springtime recipe that tastes exactly like honeysuckle smells. The following excerpt is from Forage,…
Read More