

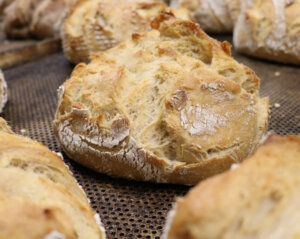
Time-Tested Sourdough Starter

Want to make bread this winter? With this low-maintenance sourdough starter recipe, you’ll have a delicious loaf of hot-from-the-oven bread on the table in no time!
The following recipe is from Wild Fermentation: The Flavor, Nutrition, and Craft of Live-Culture Foods by Sandor Katz. It has been adapted for the web.
RECIPE: Sourdough Starter
Starting a sourdough is as easy as mixing flour and water in a bowl and leaving it on the kitchen counter for a few days, stirring as often as you think of it. The yeast is there and will reveal itself. The work is in maintaining the sourdough and keeping it alive and fresh. A sourdough starter requires regular feeding and attention, not unlike a small pet.
Potentially you could pass it on to your grandchildren. I have never kept one going for more than a year at a time, fickle lover of travel adventure that I am. But luckily, sourdoughs are easy to start, so I keep starting new ones. Here is the process I use:
Timeframe- About 1 Week
Ingredients
- Flour
- Water
- Organic plums, grapes, or berries (optional)
Process
-
In a jar or bowl, mix 2 cups (500 milliliters) each of water and flour. Do not use water that smells or tastes heavily chlorinated. Starchy water from cooking potatoes or pasta is rich in nutrients that yeasts like, and can be used (cooled to body temperature) instead of plain water. I generally use rye flour because I love all-rye bread, but the flour of any grain will do.
-
Stir the mixture vigorously. One effective technique for speeding up the introduction of wild yeasts into your sourdough starter is to drop a little unwashed whole fruit into it. Often on grapes, plums, and berries you can actually see the chalky film of yeast (“the bloom”) that is drawn to their sweetness. These and other fruits with edible skins (not bananas or citrus) are great for getting sourdoughs bubbling. Use organic fruit for this. Who knows what antimicrobial compounds could lurk on the skins of the fruits of chemical agriculture?
 Cover the jar with cheesecloth or any other porous material that will keep out flies but allow the free circulation of air.
-
Store your batter in a warm place (70° to 80°F/21° to 27°C is ideal, but work with what you have) with good air circulation. Visit your batter as often as you think of it, at least daily, and stir it vigorously. Agitation distributes yeast activity and stimulates the process.
-
After some number of days you will notice tiny bubbles releasing at the surface of the batter. That is how you can tell the yeast is active. Note that the action of stirring the batter may create some bubbles. Do not confuse these with the bubbles the batter produces when you are not actively introducing air into the mixture. The number of days it will take for yeast to become active in your batter will depend upon environmental factors. Every ecosystem has its own unique microorganism populations. This is why sourdoughs from specific locations can be so distinctive. Can you guess where Lactobacillus sanfranciscensis is found?
-
Many cookbooks recommend starting a sourdough with a pinch of packaged yeast to get the process going more quickly. I myself prefer the gratifying magic of the wild yeasts finding their way to the dough. If you do not find bubbles forming after 3 or 4 days, try to find a warmer spot. Or add a commercially available sourdough starter or a pinch of packaged yeast.
-
Once yeast activity is evident, strain out the fruit. Then add 1 or 2 tablespoons (15 to 30 milliliters) more flour to the mixture each day for 3 or 4 days, and continue stirring. You can add any kind of flour, leftover cooked grains, rolled oats, or whole grains. You are now feeding the sourdough. The batter will get thicker, and start to rise, or hold some of the gas the yeast releases, but you want it to remain essentially liquid in form. Add more water if the sourdough gets so thick that it starts to cross over into solidity.
-
Once you have a thick, bubbly batter, your starter is ready to use. When you use it, pour out what you need and be sure to save some of the starter in the jar to keep the sourdough going. All you need is a little; what remains on the edges of the jar will suffice. To replenish the starter, add water roughly equal to the volume you removed for bread (2 cups/500 milliliters for most of the recipes in this book) and the same volume of flour. Stir well and leave it in a warm place to bubble. Keep it going by feeding it a little flour every day or two if you are baking at least weekly. If you use it less frequently you can refrigerate it (thus slowing the yeast’s activity). It is best to refrigerate sourdough after the replenished starter has had at least 4 to 8 hours of active bubbly fermentation. A refrigerated starter still needs to be fed once a week or so. A day or two before you plan to bake, move the starter from the fridge to a warm location and feed it, to warm it up and get the yeast active again.
Maintaining a Sourdough Starter
Your sourdough starter can live forever, given regular attention. Replenish it with water and flour every time you use it. Feed it a little fresh flour every day or two. If you go away, feed your sourdough, let it ferment for a few hours, then cover and refrigerate. Sourdough can be stored in the refrigerator for several weeks, or frozen for longer periods. If you neglect your sourdough, it may get very acidic, then eventually putrid. Up to a point, sourdoughs can be easily revived by feeding them fresh flour. Other organisms dominate after the yeast has consumed all its nutrients. But the yeasts remain present and can usually return to dominance when nourished.
Recommended Reads
Read The Book

Wild Fermentation
The Flavor, Nutrition, and Craft of Live-Culture Foods, 2nd Edition
$14.97
You may like...
-
 $19.98
 -
 $17.48
 -
 $9.97
$9.97
Recent Articles
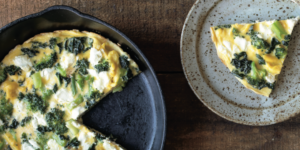
Introducing…your new favorite brunch dish! This whole broccoli frittata is packed with fresh, wildcrafted flavors that are bound to help you start your day off on the right foot. The following is an excerpt from The Forager Chef’s Book of Flora by Alan Bergo. It has been adapted for the web. RECIPE: Whole Broccoli Frittata…
Read More
Wondering where to forage for greens this spring? Look no further than hedges, which serve as natural havens for wild greens and herbs! The following is an excerpt from Hedgelands by Christopher Hart. It has been adapted for the web. Food from Hedges: Salads and Greens Let’s start by looking at all the wild foods…
Read More
There’s a whole new world out there when it comes to koji. It doesn’t matter if you’re making bread, cheese, or ice cream, koji helps you pump up the flavor! Growing Koji in Your Own Kitchen Koji, the microbe behind the delicious, umami flavors of soy sauce, miso, fermented bean sauce, and so many of…
Read More
Whether you’re looking to replace your end-of-the-day cocktail, relax before bed, or want something new to add to your tea, this non-alcoholic mocktail syrup base will do the trick. Delicious and all-natural, take a sip of this nightcap mocktail and feel your troubles melt away. The following is an excerpt from Herbal Formularies for Health…
Read More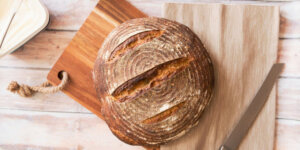
Want to enjoy bread without worrying about gluten? With Einkorn bread, a light bread with the lowest glycemic index, you can still enjoy all of the delights of bread. without any of the allergic reactions! The following is an excerpt from Restoring Heritage Grains by Eli Rogosa. It has been adapted for the web. Einkorn…
Read More